


There are some cool cylindrical perler art out there, but most are made by gluing layered circles. I personally like the look of outwards-facing perler art that’s been curved into a cylinder (and not using glue). I haven’t found how they’re made, so here’s my experiment and pattern.

Completed cup

Kei
I made this tall perler cup to store my diy hair sticks 🙂

Pattern

Kei
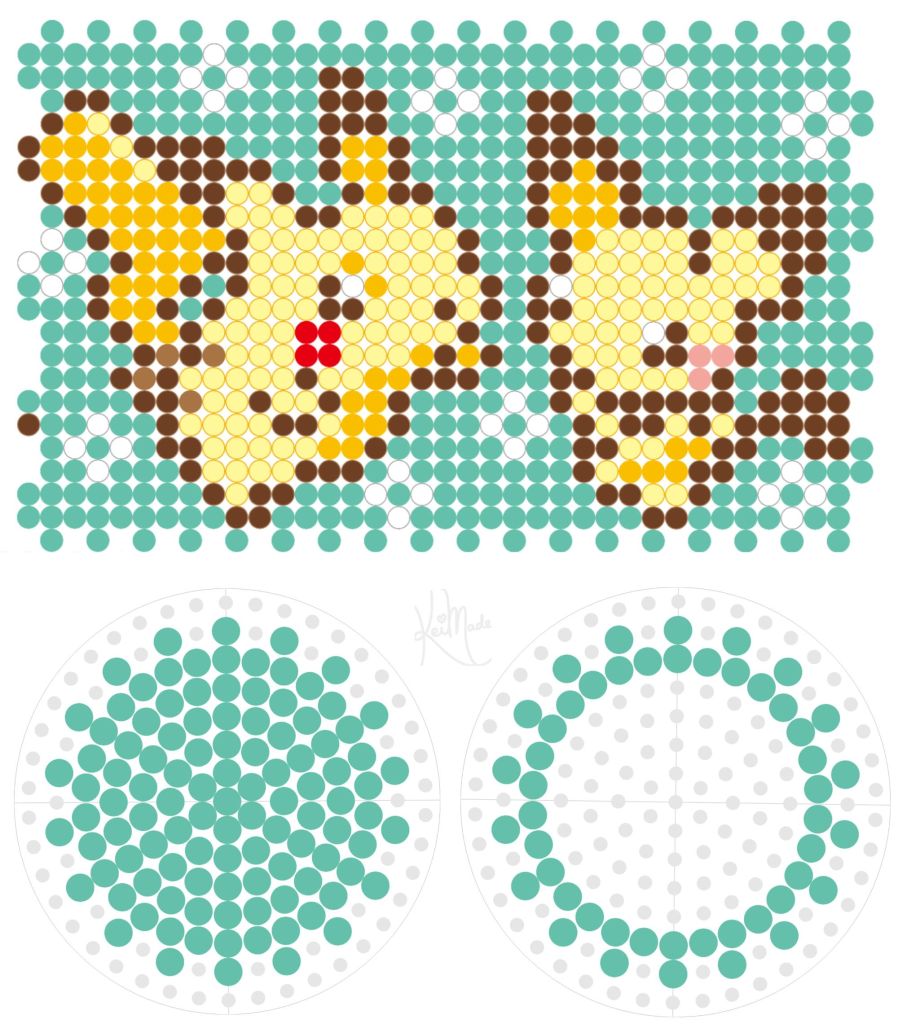
The main panel needs to be mirrored as only the back side will be fused so it can curl.
For it to curl into a cylinder well, the bead spacing for the top and bottom needed to be 1.
The hollow circle is for the top of the cup (to support it in shape).
For it to curl into a cylinder well, the bead spacing for the top and bottom needed to be 1.
The hollow circle is for the top of the cup (to support it in shape).
Advertisements
Kei
The side edges of the main panel didn’t need to be zig zagged. (See end of assembly section.)
Beads list
| White | 39 |
| Pastel Yellow | 137 |
| Cheddar | 63 |
| Blush | 3 |
| Red | 4 |
| Light Green | 360+109+48 = 517 |
| Light Brown | 4 |
| Brown | 182 |
Assembly
Kei
The bottom and top circles were ironed on both sides. The main rectangle was ironed on the back side only, to allow for it to curve right way out.
The main panel was snapped into the bottom panel, then in to the top panel.
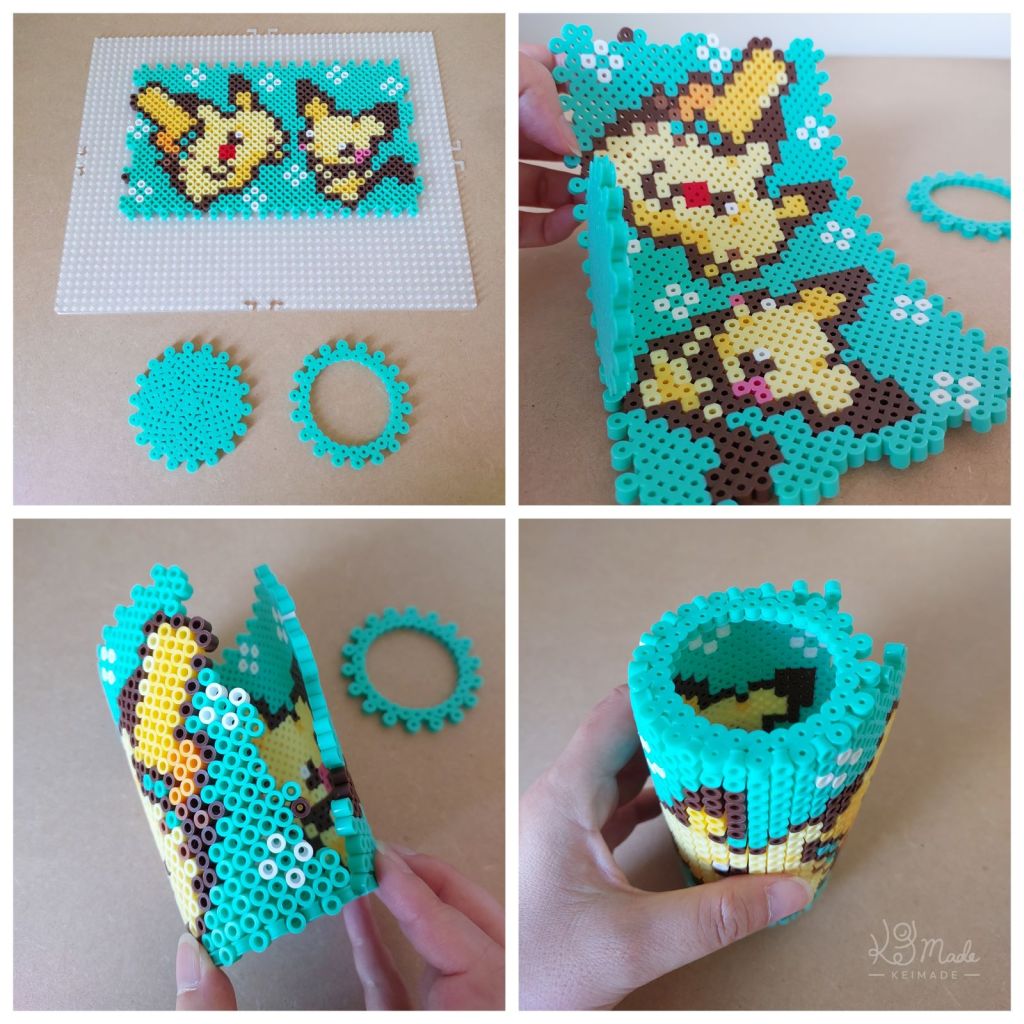
The zig zagged side dges were snapped together, but they liked to spread outwards. So I used a needle and thread to secure the cylinder.

Kei
Because the back connecting edge doesn’t snap in close enough, next time I would make those edges straight instead of zig zag to make it look nicer.

Shinji
I’d still call this a success as the cup functions well.
Kei
If you found my blog helpful, please buy me a coffee or leave a tip to support me 🙏



Comments (1)
MyBeadPattern Teamsays:
August 3, 2026 at 9:54 pmThe mirrored main panel and one-side-only ironing explanation answered the part that often gets lost in 3D bead tutorials: how the finished face stays outward while the sheet remains flexible enough to curve. The exact bead counts are also excellent. We build a browser-local bead-pattern tool, and a repeat-width check plus an inventory-limited palette would pair naturally with this kind of cylindrical design.