

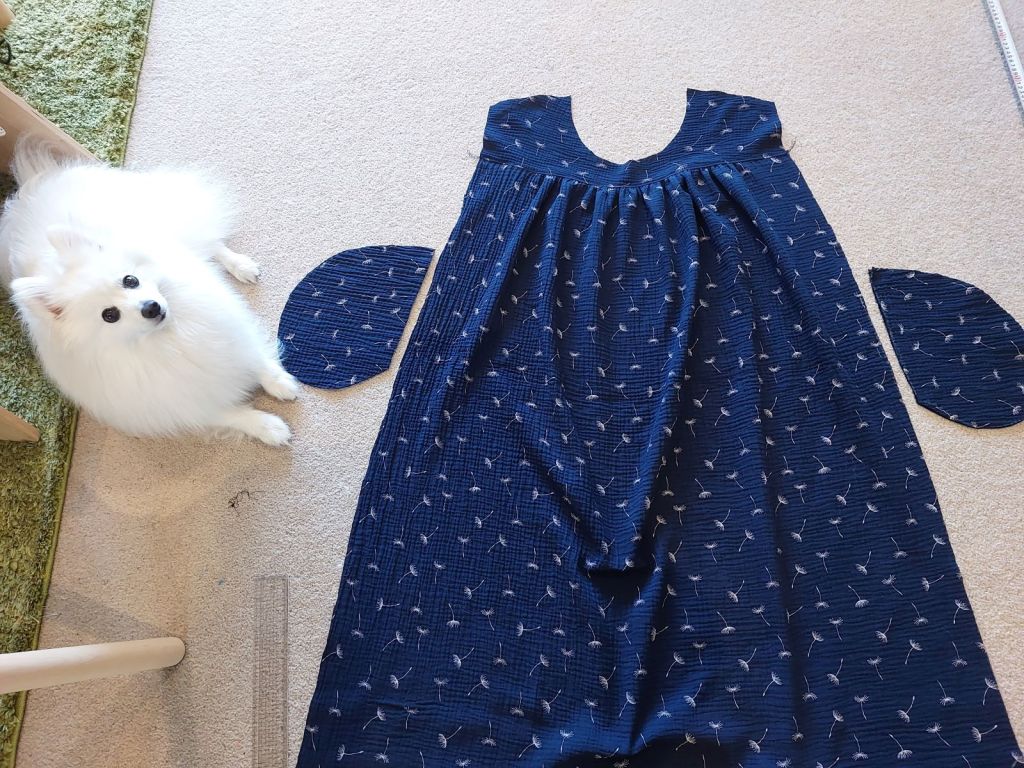
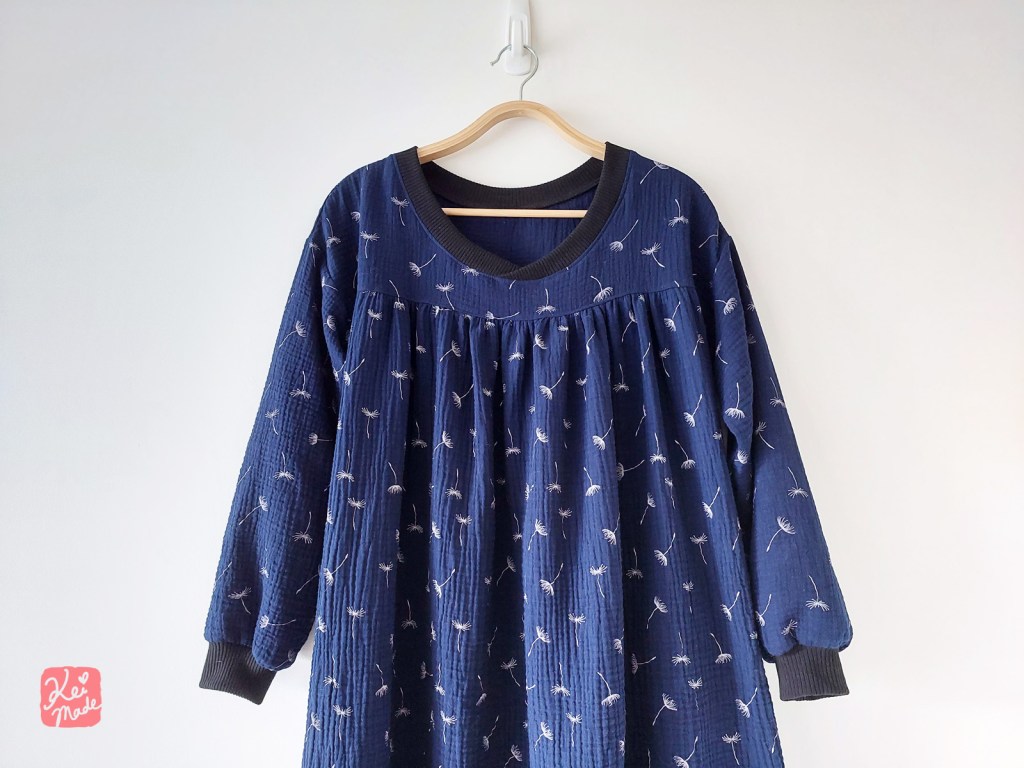
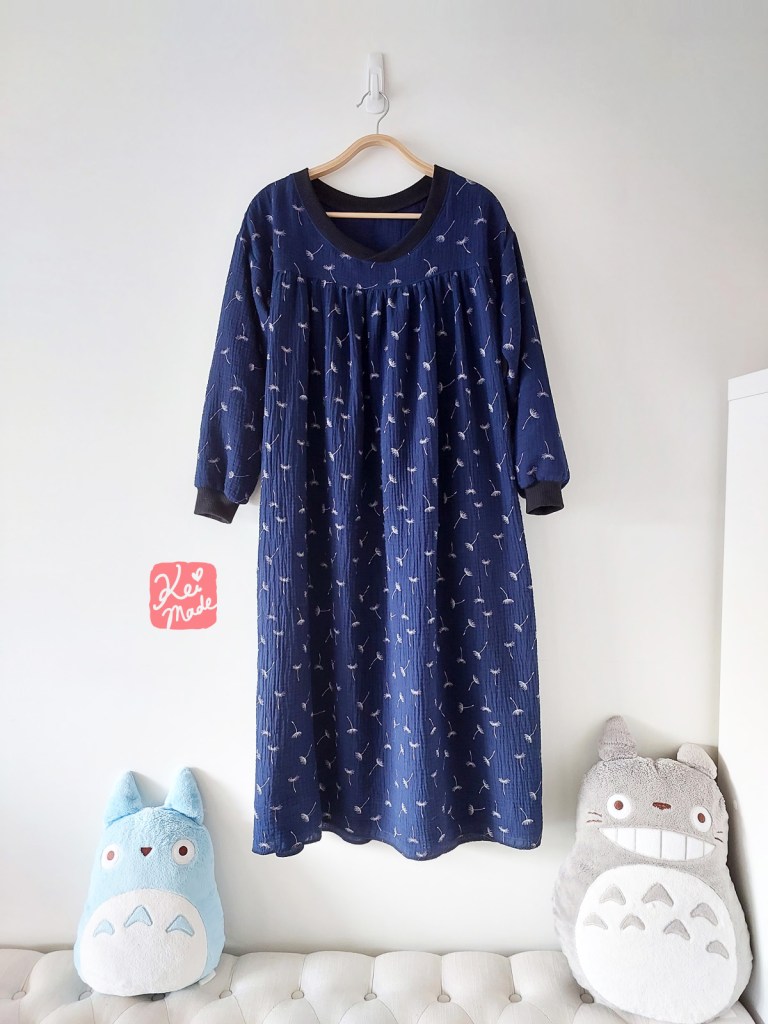
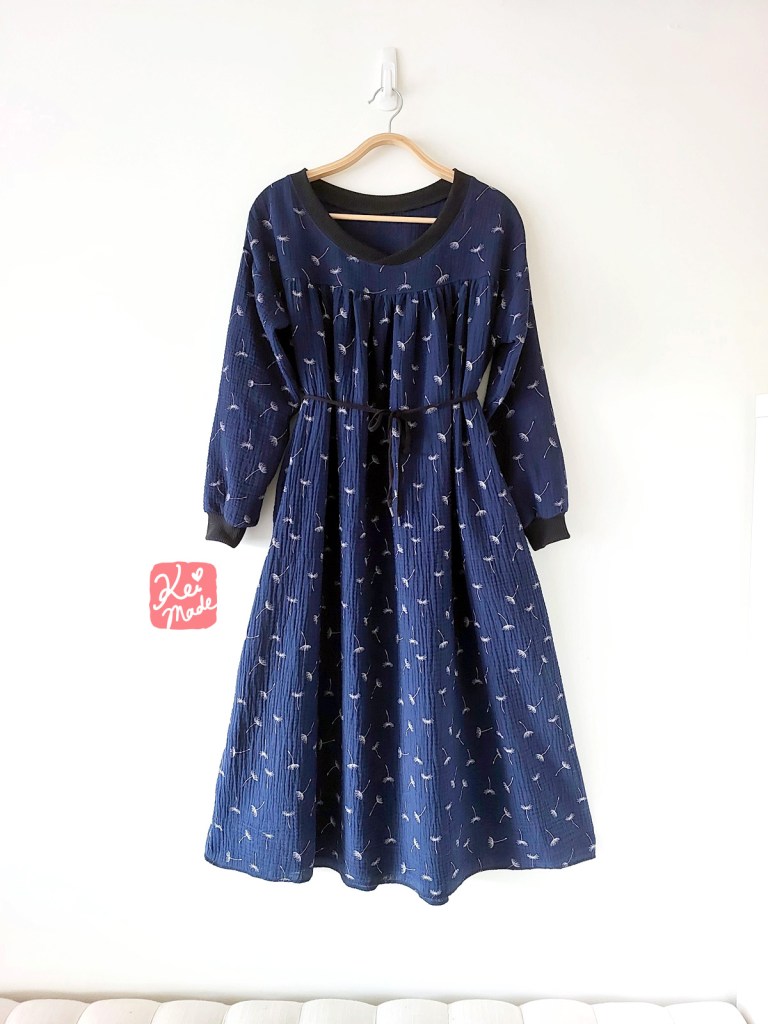
This is a slight variation to my v-neck midi dress with long puff sleeves and gathered yoke. It has pockets too!
Pattern
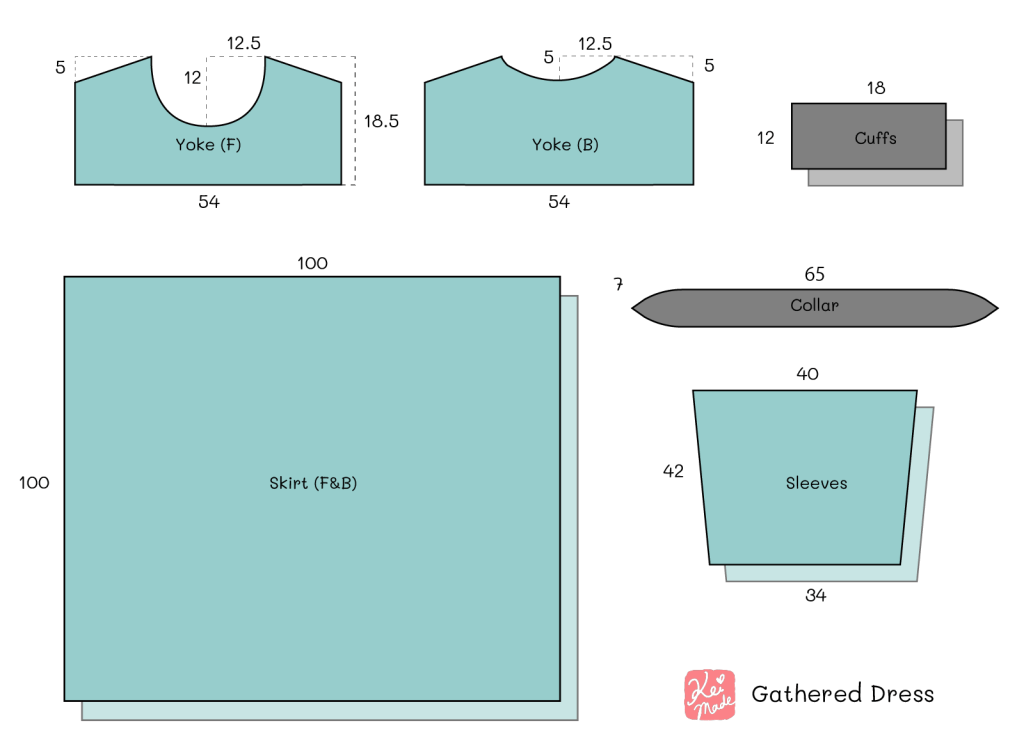
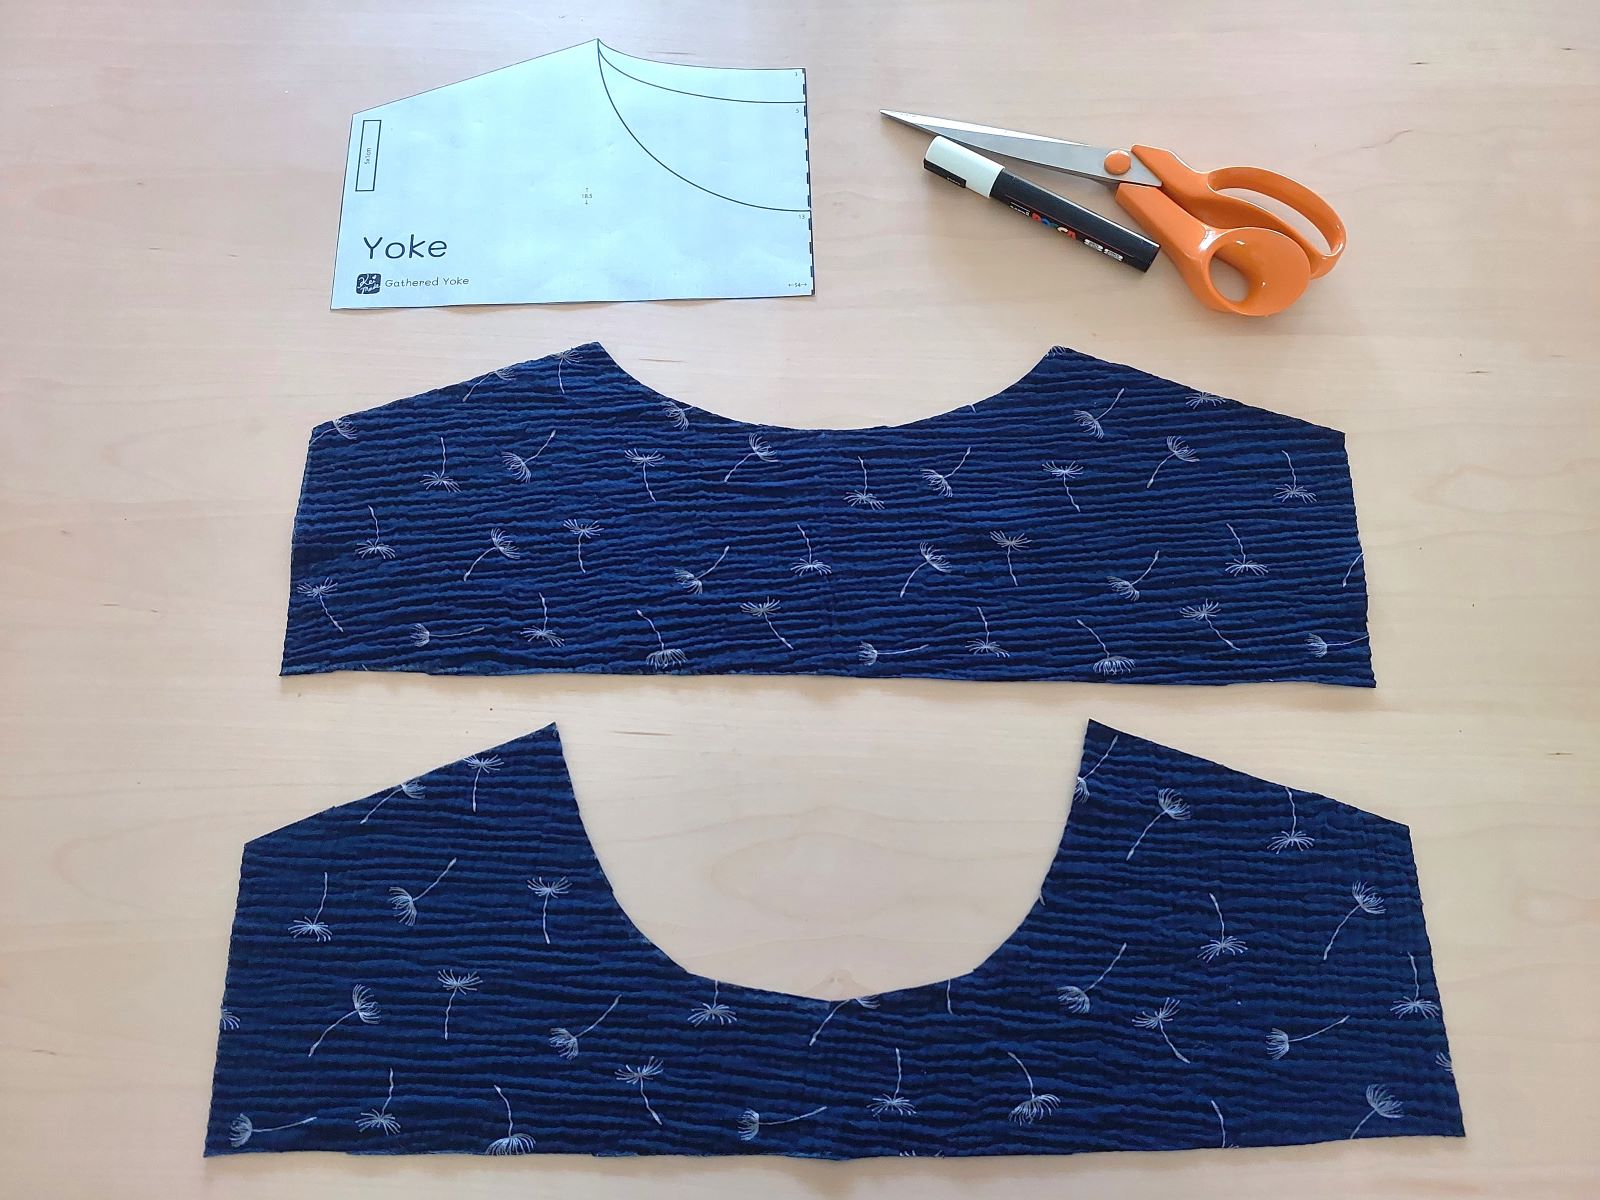
Most parts are rectangles, but I made a printable pattern for the yoke and pockets:


↑ You can buy Spitz merch to support my blog ↑

This yoke pattern assumes light-weave fabric that stretches a little with the weight of the dress. Increase the height by ~2cm if sewing with tight-weave fabric.
If you want to make the neckline and cuffs with the same fabric as the bodice, without using ribbing, see:
Steps
Gather the skirt
Gather the skirt panels so the skirt width matches the yoke width. Keep about 10cm on both sides un-gathered.

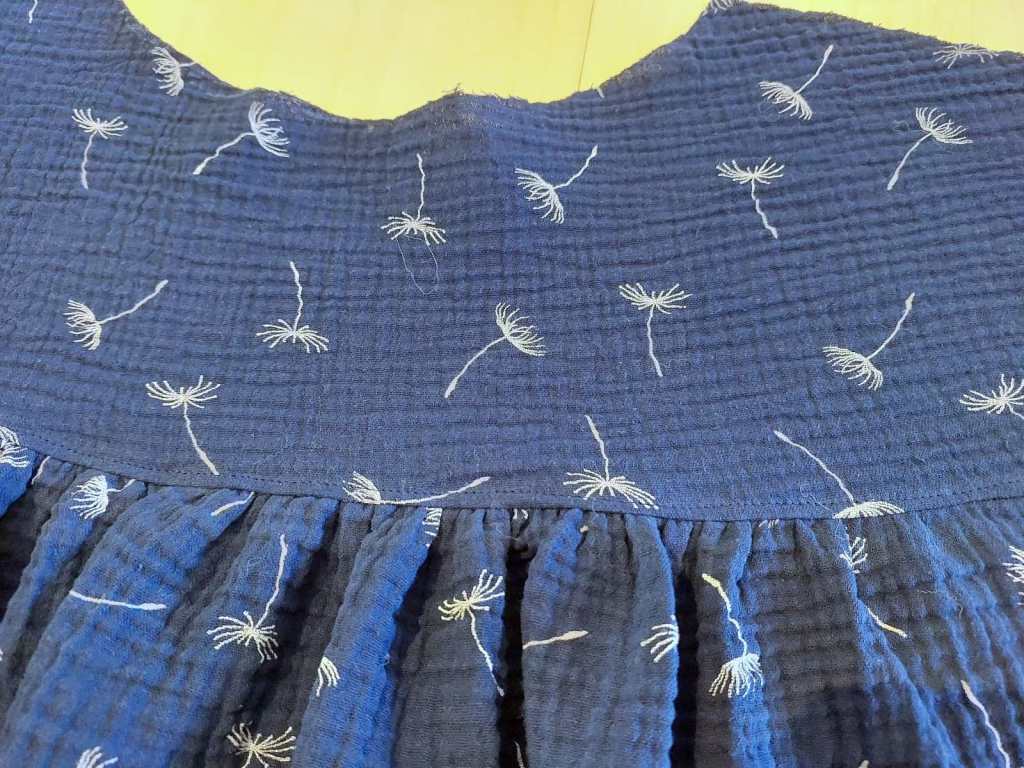
Connect the yoke and skirt
Serge and attach the skirt to the yoke. Add a top stitch.

Repeat 1 & 2 for the back.
Add pockets
Sew pockets to the front of the dress – follow my post how to sew in-seam pockets:

Attach shoulders & sleeves
Iron on a strip of interfacing along the shoulders. Serge the shoulders together, inside out, to attach the front and back of the dress.
Then, open it up and serge the sleeves onto the yoke and top parts of the skirt.


Sew the sides together
Serge the front and back of the dress together; from the cuff of the sleeves, around the armpits, to the hem. (Be careful to not sew the pockets closed – feel the fabric while you sew so it’s on the left of the needles.)


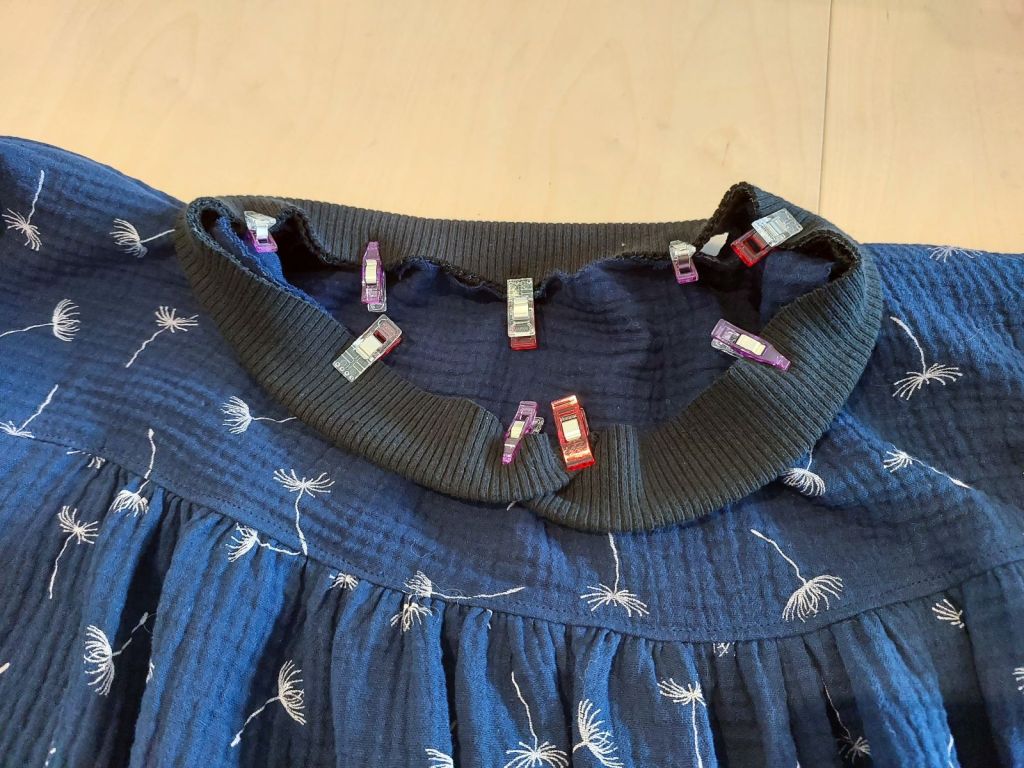
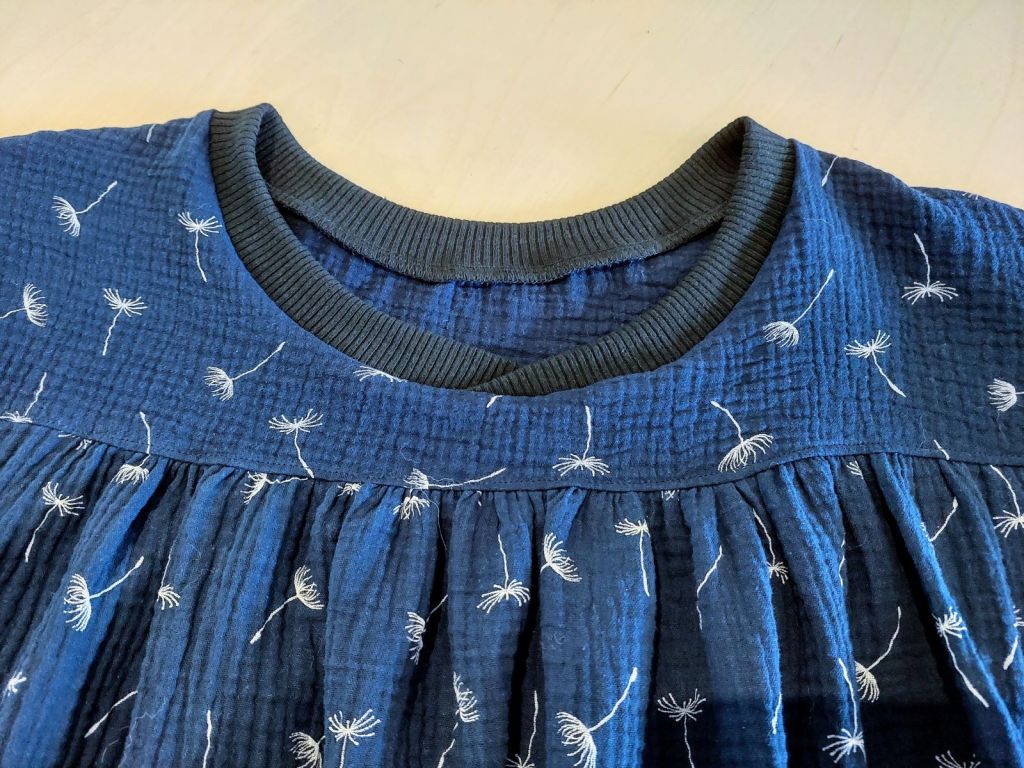
Make the neckline
Measure the circumference of the neckline to finalise the ribbing length.
My neckline measured 70cm, so I cut 65cm of ribbing fabric (after stretching it a little) and planned for a 5cm overlap to give it a v-neck finish.
Iron the ribbing in half, and clip it along the neckline. Serge the neckline, and give it a top stitch.
Add cuffs
Make cuffs with ribbing fabric and serge it onto the end of the sleeves. (Photos from another project.)


Hem the dress
Try the dress on to finalise its length. Hem hem the bottom with a cover stitch or overlock + lock stitch.
If you find my blog helpful, please buy me a coffee or leave a tip to support me 🙏


Leave a Reply