Last year I made a reversible Obi from two vintage kimonos. This time I decided to upcycle the remaining halves of the kimonos, to make a more casual sash for pairing with a Yukata.
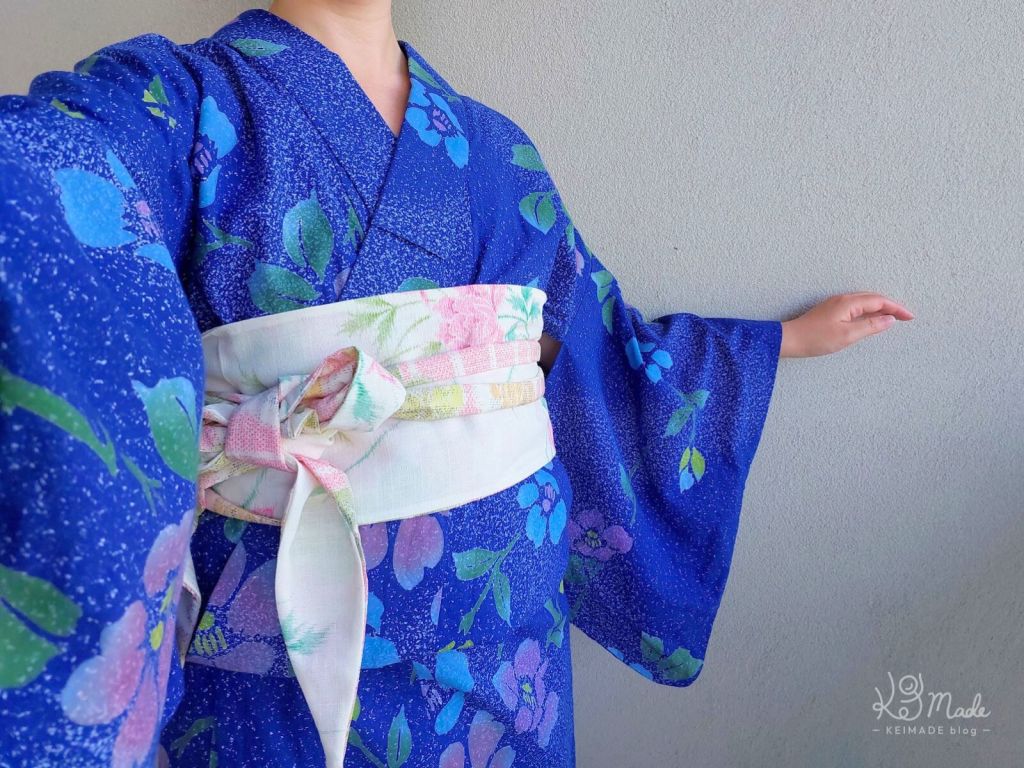

After looking up some casual sashes paired with a kimono, I decided to use Brother’s Kimono Sash Belt Remake Recipe. While most sashes paired with a kimono looked strange from the back (usually the sash ends and the ribbon starts at the back, exposing parts of the back), the back side of this one looked like it’ll get full coverage.
The pattern was very straight forward:

(I made it slightly longer with fabric length of 144cm x2 (instead of 135cm x2 as above), because that’s how much fabric I had to play with. 135×2 would have been long enough if not tying a bow knot.)
The shoulder line of kimonos are connected. The kimono remnants were cut up to a width of 19cm while folded, and any attached fabric were unstitched.

The sash panels were sewn together, inside out, with a 15cm gap along a long edge so it can be turned out. The seam allowance was 1cm, which was trimmed down to about 5mm once it was sewn.
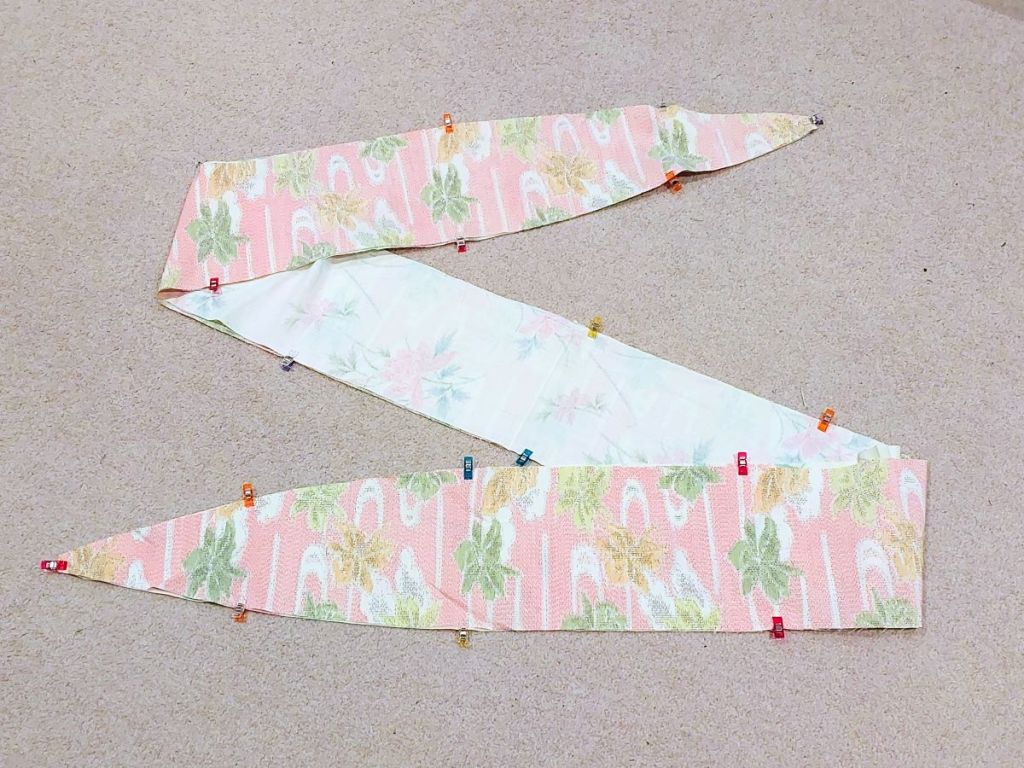

(I should have kept it untrimmed until I ironed the seams inwards; I wasn’t able to iron it until it was turned right way out.)
The sash was turned right way out, and ironed flat from the outside. Then, finally, the opening was sewn closed.

To wear it, you’d wrap the middle of the sash at the front, wrap both ends around the back, and tie it at the front.

Using my backpack as a model, one side looks like this.

I’m modelling too. The reverse side looks like this.


And most importantly, the back side gets full coverage too.

You could wear it back to front and it’ll still look great.
Overall, this sash has a more casual look (and admittedly is more comfortable) than my previous Obi project:

But both would have its time and place 🙂 The casual sash version would be great for summer!


Leave a Reply