While wearing a kimono the traditional way is not that hard if the size fits you, when it is oversized it’s very tricky to wear and easier to become unravelled upon moving.
I experimented with ways to make a convincing looking two-part kimono, including faux wrap skirts and inset sleeves.
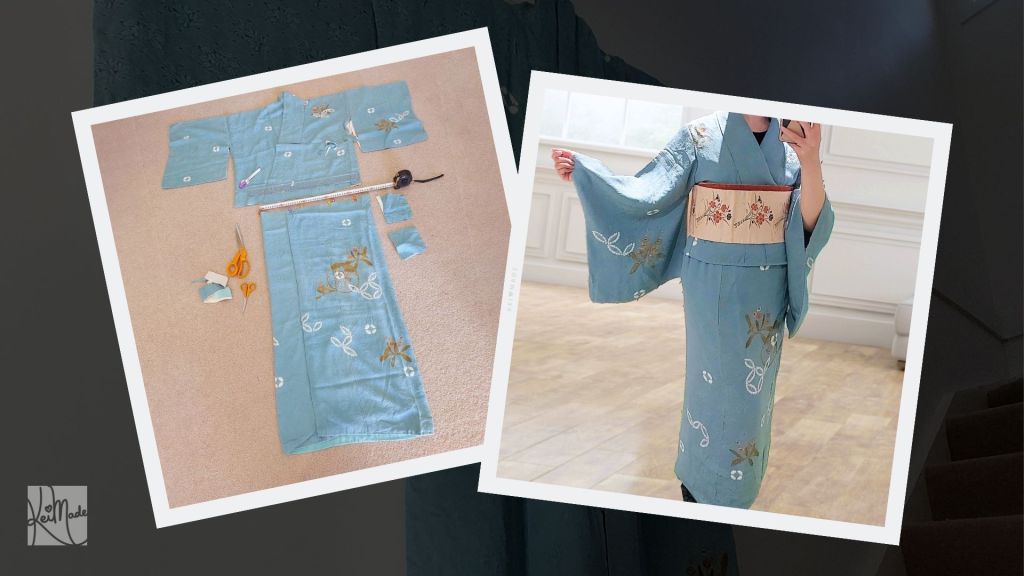
Making the skirt
I’ve successfully made “Nibushiki” (Two-part) summer kimonos before, but I usually convert the bottom into a closed skirt so that it’s easy to walk in and the wind won’t unravel them.
But I found this Youtube video that keeps the skirt in wrap form, and because it does look more convincing as a kimono, I thought I’d give it a try with some slight changes. There was a pretty good chance the skirt will work out well, because she made the hem uneven to get that tapered skirt look, and she folded the inner wrap outwards to enable movement.

I decided to aim for a 85cm long skirt. I also un-stitched the Eri (extended collar) off before sewing the skirt together to keep the bulk down.
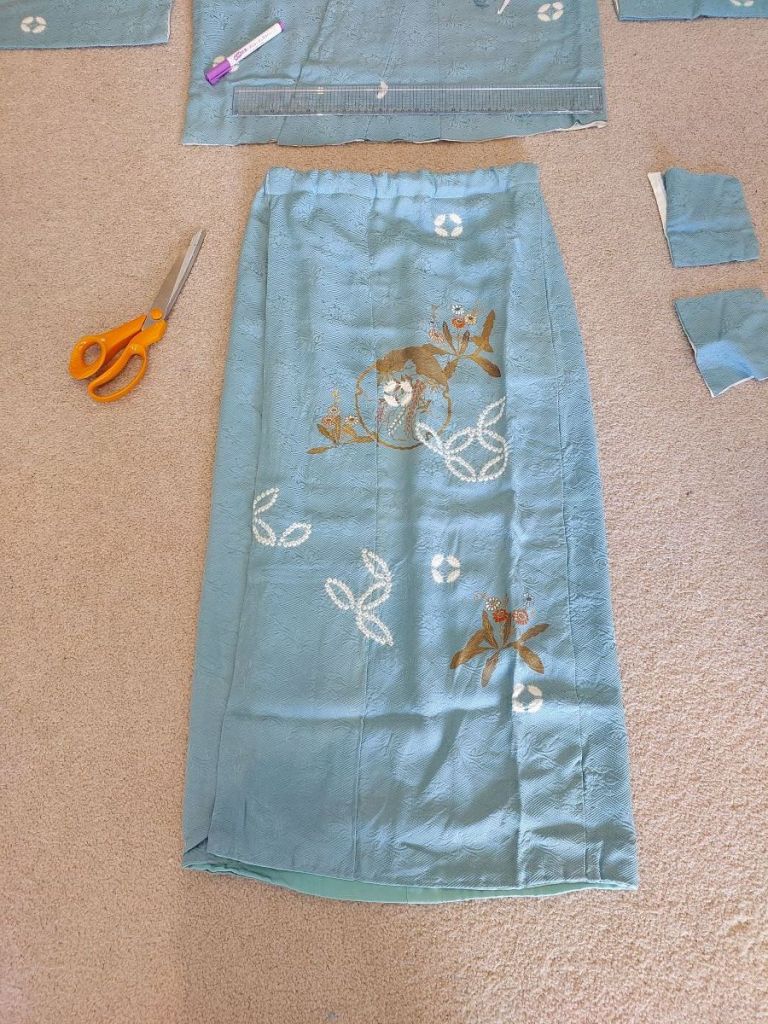
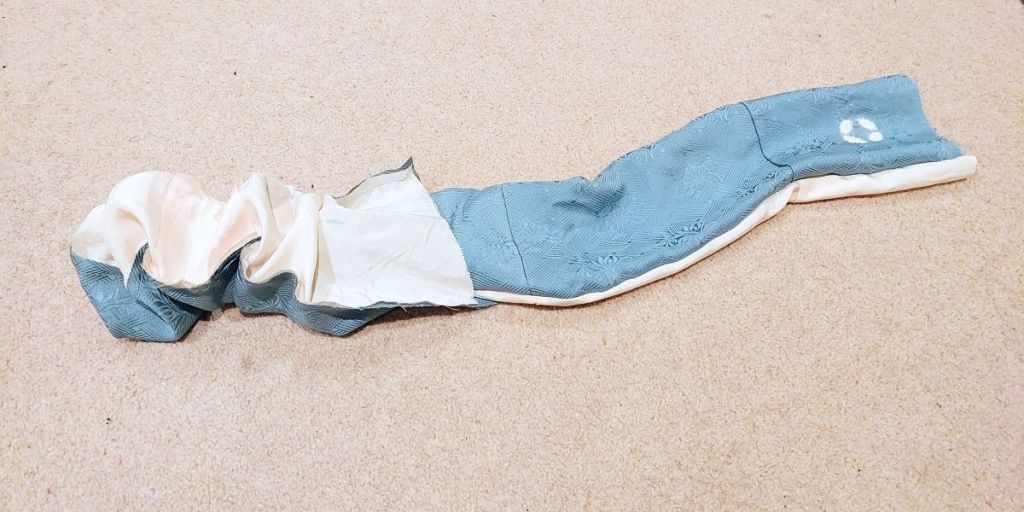
Cut bottom of the kimono at about 90cm.

Fold the inner flap over by 48cm. Fold the end back by 5cm, so it becomes 43cm. (This is so the wrapped skirt doesn’t get stuck behind you and has a chance to open up when you walk.)
Draw a line from the end at 7cm to the side at 0cm. Cut the diagonal fabric off.
Clip the remaining skirt to the top of the skirt. (This lifts the inner layer up by 7cm and keeps the kimono skirt shape.)

Fold the upper flap over so the final width of the skirt is 48cm.
Draw a line from the end at 3cm to the side at 0cm. Cut the diagonal fabric off.
Clip the remaining skirt to the top of the skirt (This lifts the outer layer by 3cm so the hem doesn’t spread out when worn.)

Serge the overlapped fabric together in the round, so it turns into a skirt tube.

Fold the top in by 4cm and sew around, leaving a gap for inserting elastic.
Insert elastic. (I cut 74cm of 20mm-wide woven elastic, inserted it and overlapped it by 2cm before sewing the ends together.
Close off the elastic inserting gap.
Complete!
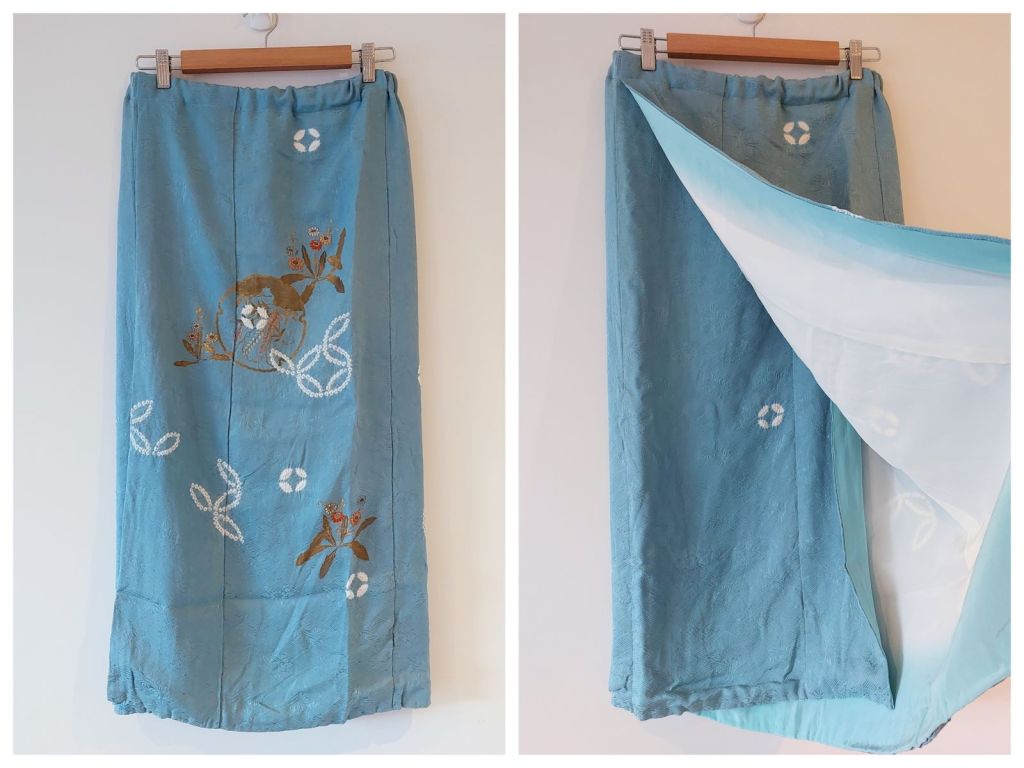
And, it actually worked really well! It looks like a proper kimono skirt, with it being slightly tapered towards the hem. And because there is that 5cm overlap of the inner wrap, the skirt does open up allowing me to walk in it.

A couple of changes I’m thinking about is to make the width of the pre-elasticated skirt 50cm instead of 48cm just to make it that little bit easier to pull up over the hips. (There’s enough clearance, but I’m used to having more.) And maybe aim for 87cm length as the back might be a tad short, meaning it the two diagonal cuts might be at 8cm and 4cm.
Making the waistband with a different thinner fabric would take off some bulk at the waist too.
I need to try it out on a windy day to make sure it doesn’t unwrap itself in the wind, which is common when a kimono is split in to two pieces. I have a feeling if I’m taking decent strides the wind will pick the skirt up, so a inner skirt would be needed.
Making the top: Take 1 – Two piece kimono
For the kimono top, I was going to cut the back pieces at 52cm in length, and cut the front pieces diagonally so the ends become 62cm. This is to account for the back of the kimono being worn lower than the front. (It was easier to measure from the hem at 12cm and 2cm than from the top.)

But after doing a basting stitch for this and trying it on, the “Ohashori” part under the Obi wasn’t looking quite right. It was hard to make it look right because, well, unlike a western-style top kimonos don’t sit straight. So I undid the basting stitches.
An idea was to sew the middle Ohashori piece onto the skirt, making it a 2-piece set up, but I like the idea that I could wear just the skirt with a non-traditional top.
Making the top: Take 2 – Three piece kimono
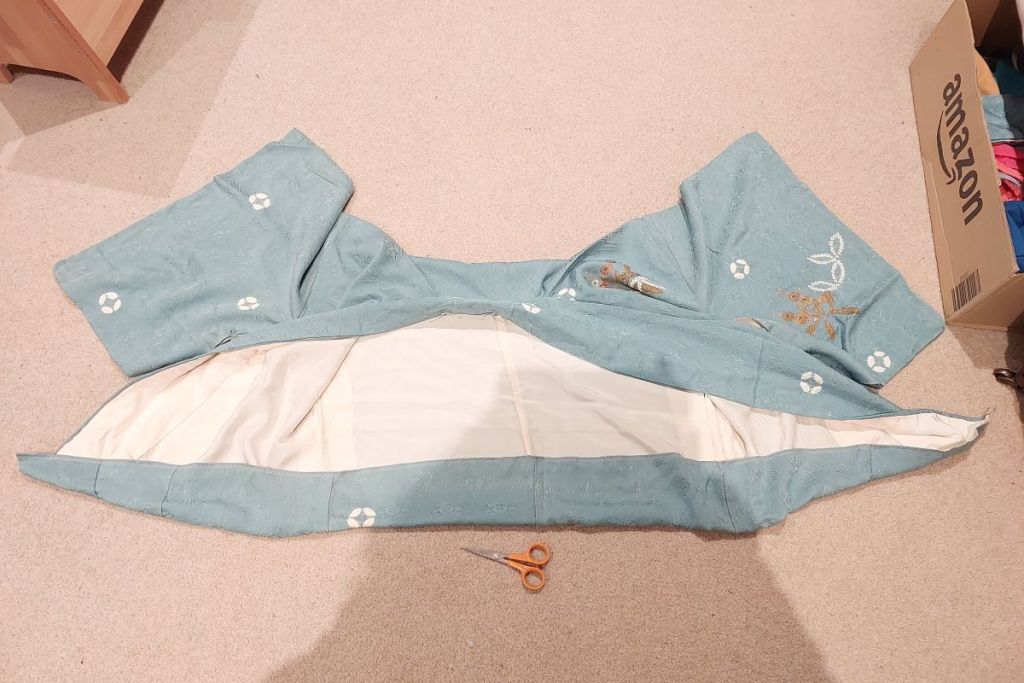
To make the faux-ohashori, i cut off 15cm off the bottom of the top. This left about 50cm of the top intact, just enough length of the kimono top to be worn. The top was simply serged at the hem.

The Okumi (fabric panel on both sides of the kimono next to the collar) were taken off the Ohashori middle part, and the lining was pulled off. The lining and outer fabrics were sewn inside out along the long edges, and turned around into a long tube. Once turned right way out, he ends of the tube were tucked in and sewn to conceal the seams.

So here was the traditional kimono converted into a 3-piece one!

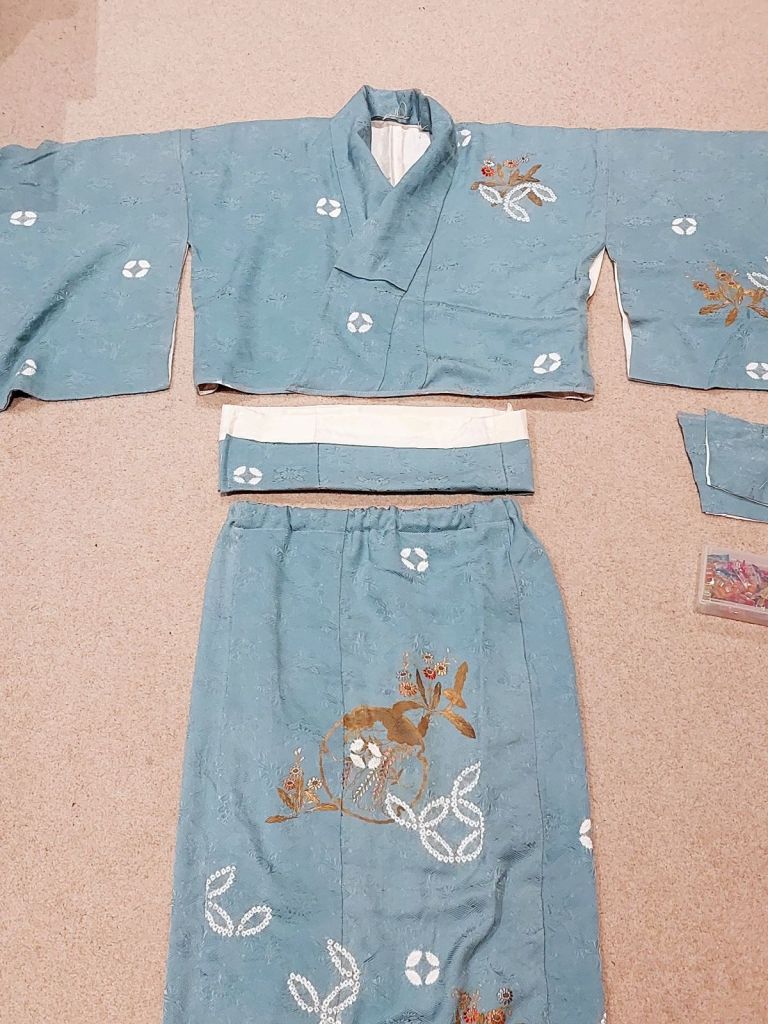
Quickly trying it on, it looked like this.

It’s not bad at all! Although you can’t see it, I feel the front of the top is a bit short when putting it on (the back is long enough). And the middle piece could be longer so it’s easier to put on.
I could have that extra fabric if the the waistband of the skirt is made with a different fabric.
Making the top: Take 3 – Inset Sleeves
So I’m back to making a 2-piece kimono. The problems I want to fix with the top half of the traditional kimono are:
- If you lift your arms, the kimono top gets tugged out above the Obi sash.
- The shoulder section is worn behind the shoulders so the front becomes much shorter than the back, and very angular.
- You can see what you’re wearing underneath from the big slits under the sleeves.
I found this pattern for a cosplay kimono. The bodice and sleeves are made from inset sleeves, like a typical t-shirt.
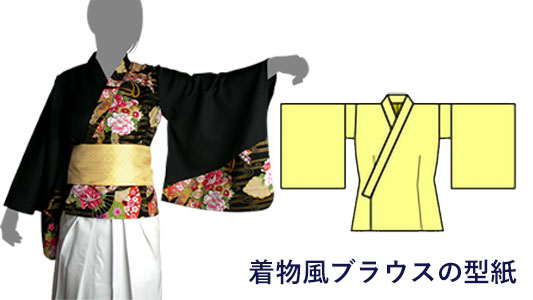
So I thought I’d try altering the top of the kimono based on that idea.
The top was cut up using a L size pattern, making the flappy sleeves attached to the end of inset sleeves.


Then it was just like making a typical top:
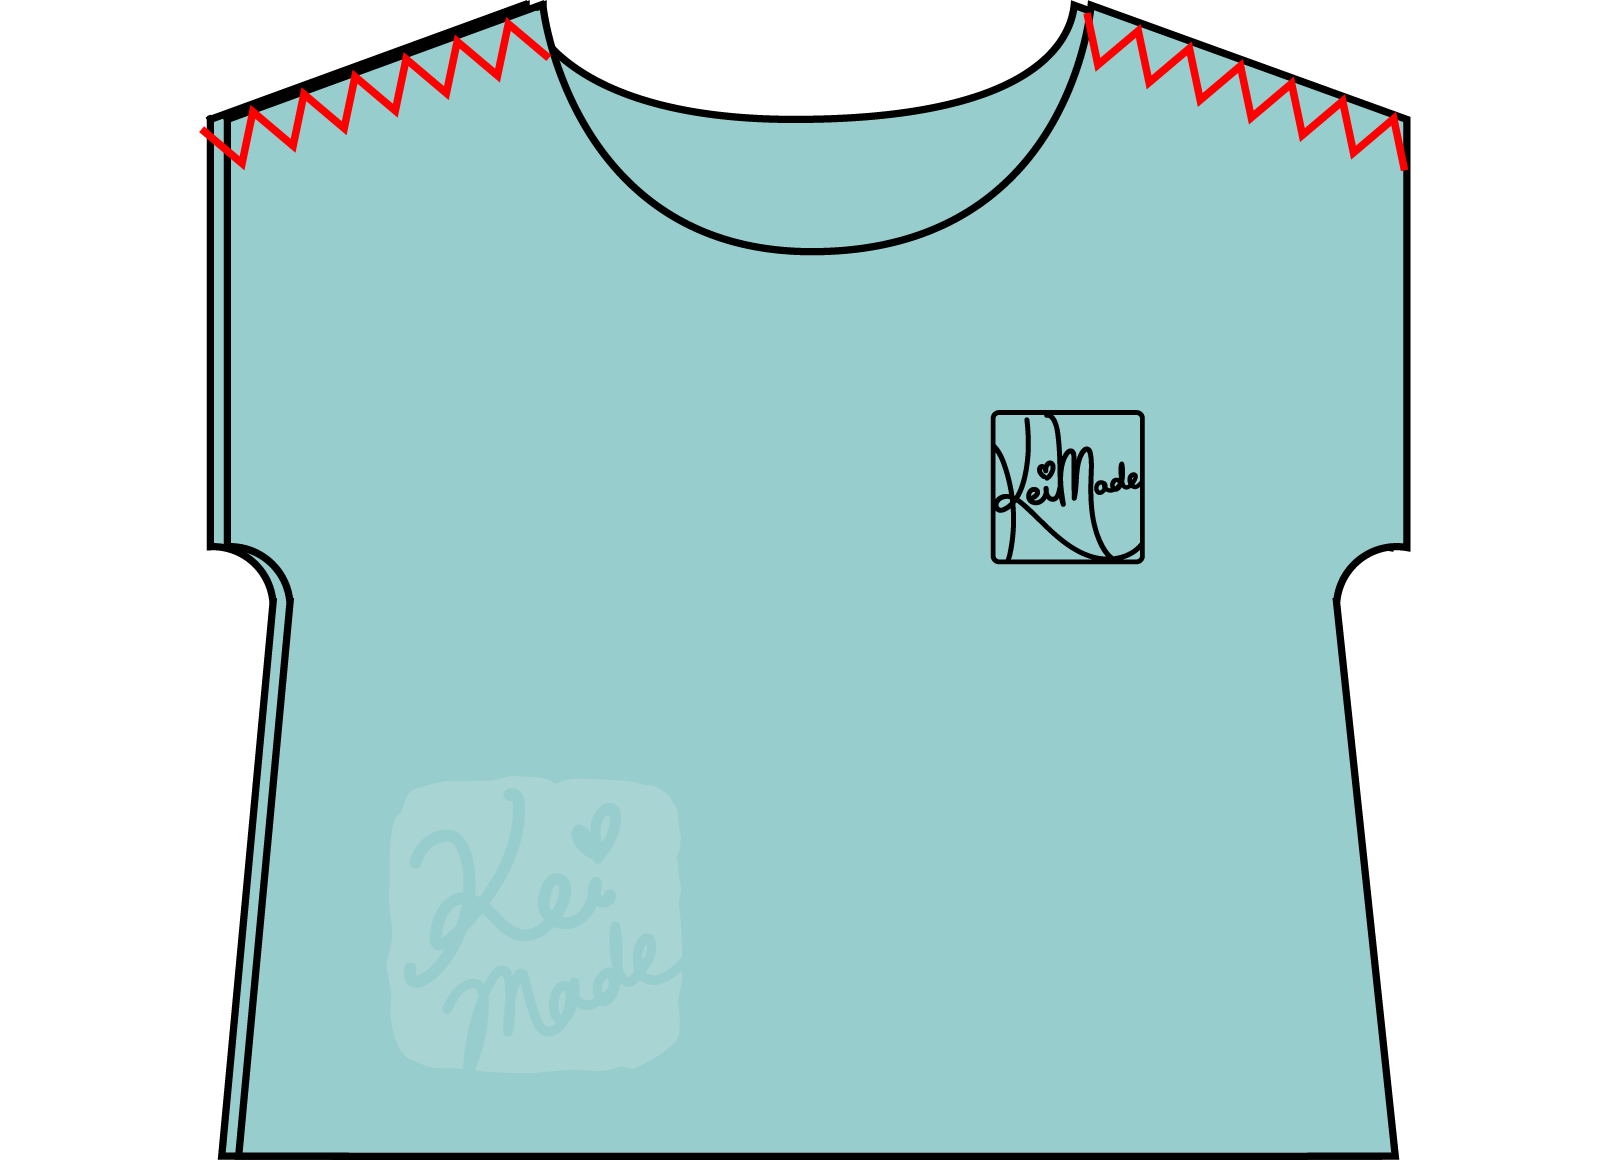
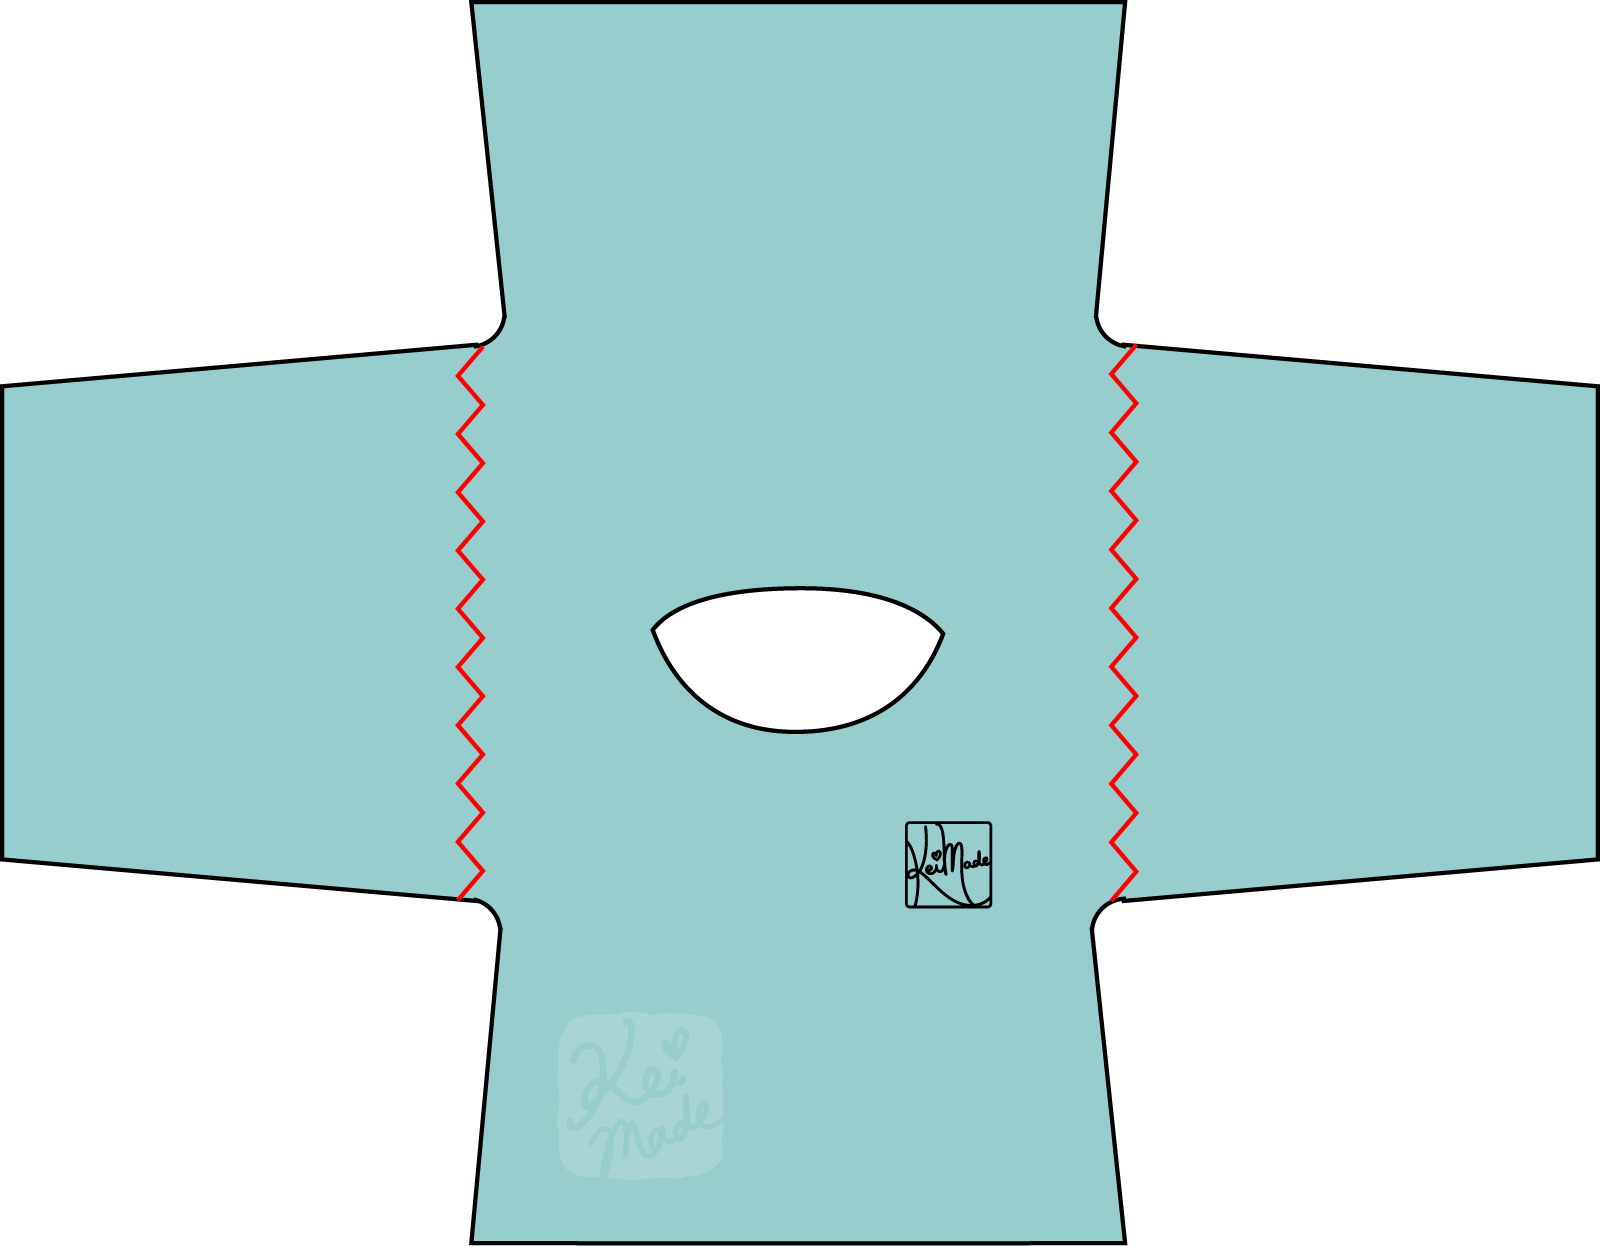

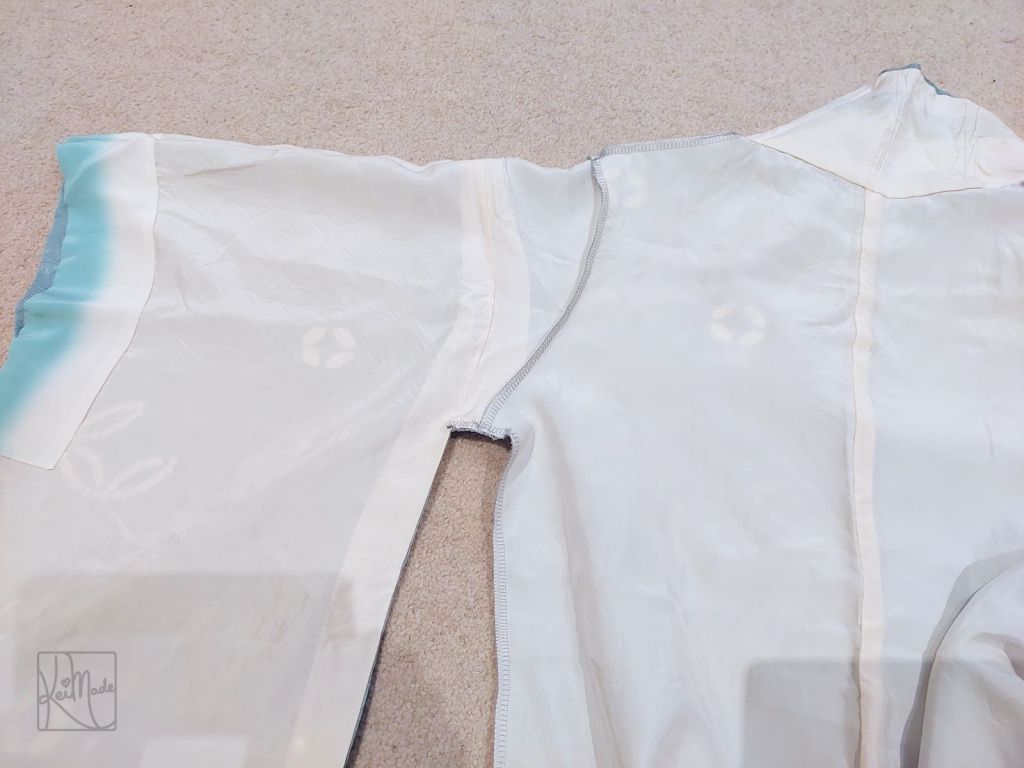
The shoulders were serged together, the sleeves were attached, then serged down sides (from that little bit at the end of the inset sleeves, around the armpits, to the hem).
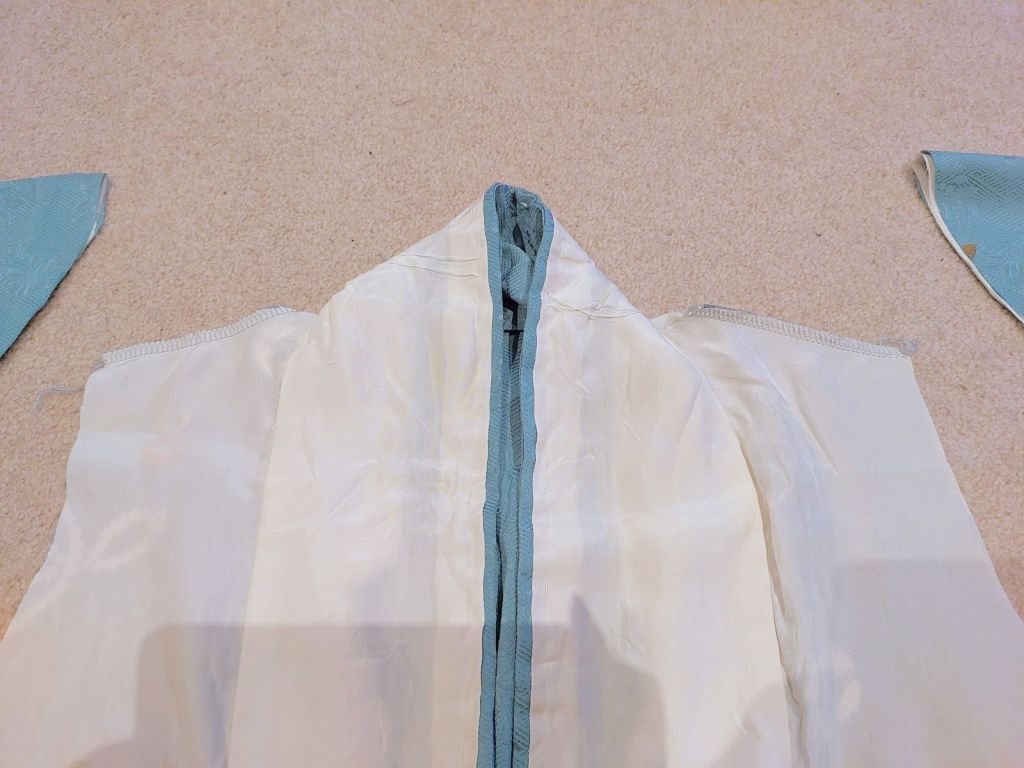

And here we were:
The dart lines on my pattern was too low, so I re-drew a diamond dart so that it’s 20cm tall in total and 3cm wide at its widest point (at just above the 40cm mark from the top).
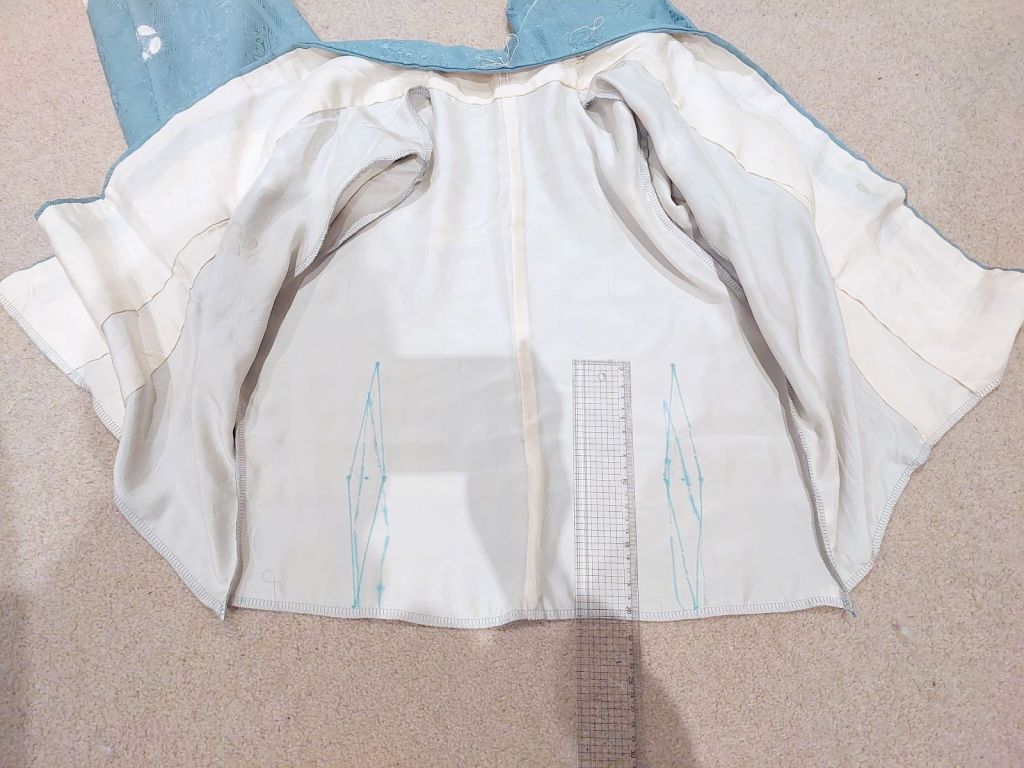

The shoulder dart was made to smooth out the line from the end of the serge near the collar to the collar.

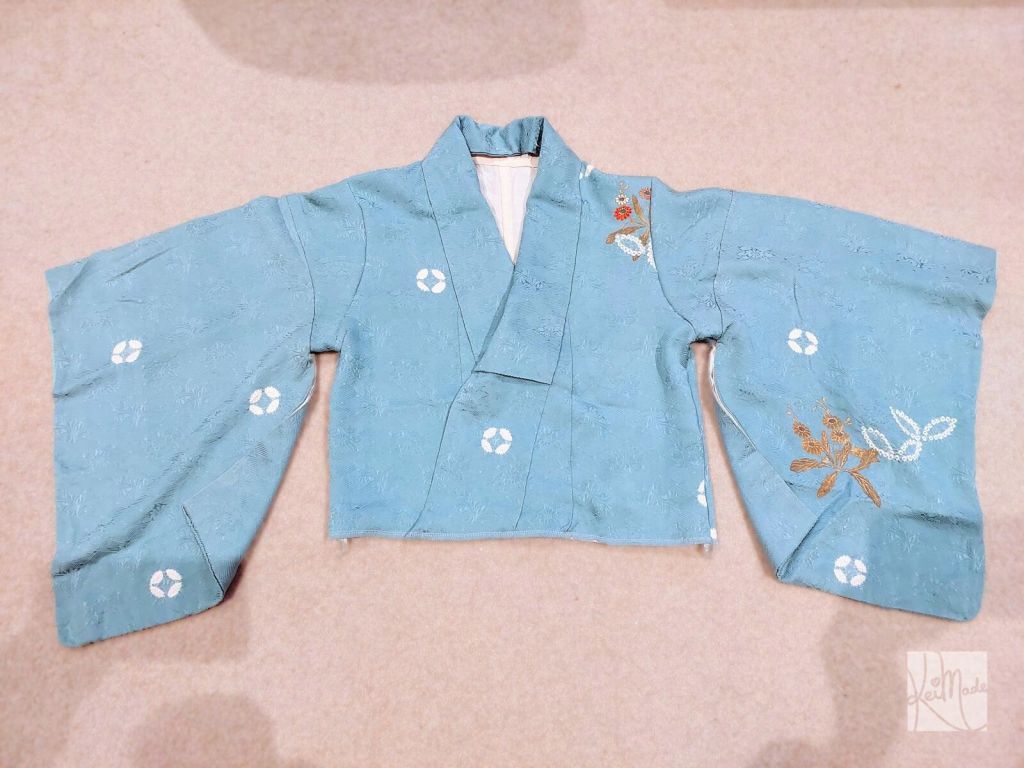
Finally, the hem was folded up by 1cm and sewn all along; the right hem (when you’ve wrapped in it, the inner side) was hemmed up 4cm so it doesn’t show when wrapped.


And she was le done!
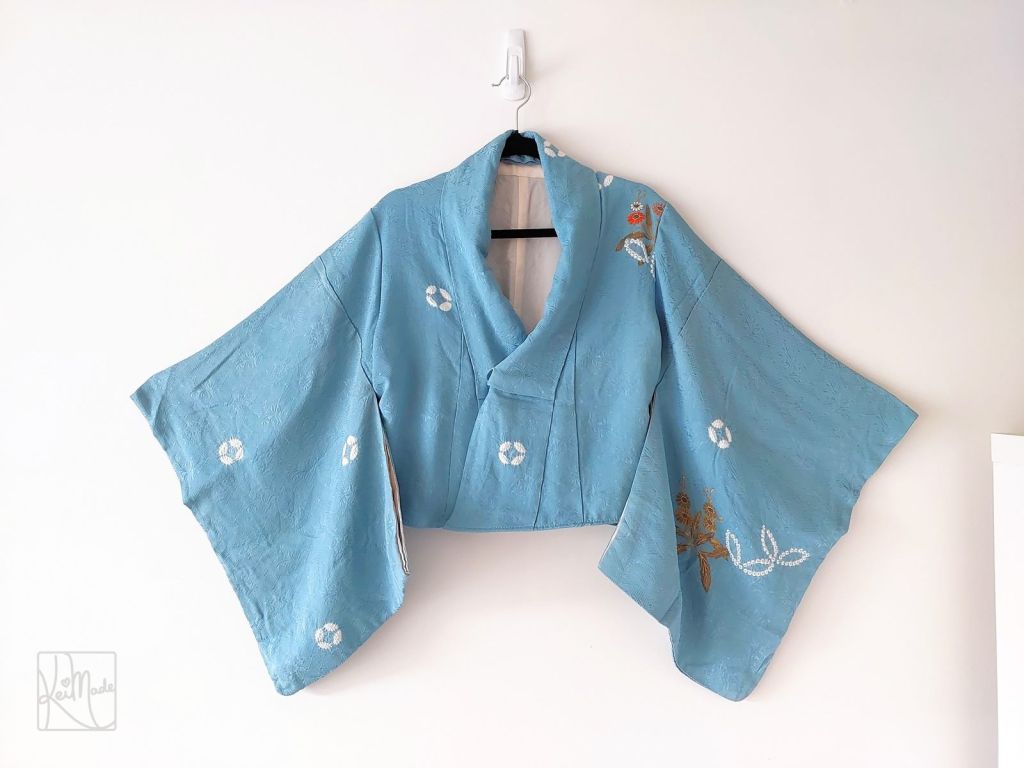


The one thing you lose is the draping of the back collar, which might get sorted if you plan where the shoulder line is serged.
I had to work with the length I had so the hem is only sewn up by 1cm; if it wasn’t pre-cut from the previous experiment and I had more length left over, I could probably make the hem taller and look more like an Ohashori.
The last thing I might do is to pull off the Kake-eri (the extra layer of collar at the top) to reduce the bulk.
Conclusion
While wearing a kimono the traditional way is not that hard if its size is suited to you, when it is oversized it’s very tricky to wear.
Transforming the top of an oversized kimono to have inset sleeves is a pretty good hack to make it sit well on your body and prevent it from flowing out of the Obi when moving.
Cutting the bottom half of the kimono and altering it to become a faux wrap skit makes a pretty convincing bottom.
But, if you try walking in it with decent strides, you need to fight fabric friction at every step, just like when you wear a kimono properly. So making a single pleat faux wrap skirt may be better:


Leave a Reply