After a 3-year hiatus from Perler bead art, I’m finally back. Why did I stop? Bead shifting and fusing mishaps kept ruining my projects. But with the help of my partner, I designed a better pegboard—now those problems are solved, and I’m ready to create again.
Why I left Perler art
I love designing in pixels, and I love the outcome of Perler art – especially when making functional items like pen cups and containers.
But there were 3 reasons that stopped me from making Perler art:
| Problem | Solution |
|---|---|
| 1. Household irons have steam holes that prevent even fusing. | A heat press solved this. |
| 2. Designing is fun but making is monotonous. | My bead aligner tool solved this. |
| 3. Perler pegboards aren’t flat and causes bead accidents. | ← the problem I needed to solve, without masking tape. |

It can ruin an entire project; it’s frustrating and devastating.
What’s wrong with Perler pegboards?
The transparent Perler pegboards tend to be slightly curved or warped by default, which causes the beads to not fuse together properly. While you can use the masking tape method and remove your design before fusing, isn’t it strange that you need to do that?
Perler bead crafting is designed primarily for kids to spark creativity, so the beads and accessories don’t have to be perfect. But for me to continue creating, I needed a better pegboard.
Designing a better pegboard
To overcome the shortcomings of the Perler pegboard, the alternative pegboard needed to solve the following.
- Pegboard needs to be flat.
- Beads need to stay on the pegboard while fusing & when peeling off parchment paper (so any non-fused areas can be fixed without bead accidents).
- Beads need to come off the pegboard when fusing is complete.
- Ideally the pegboard is larger.
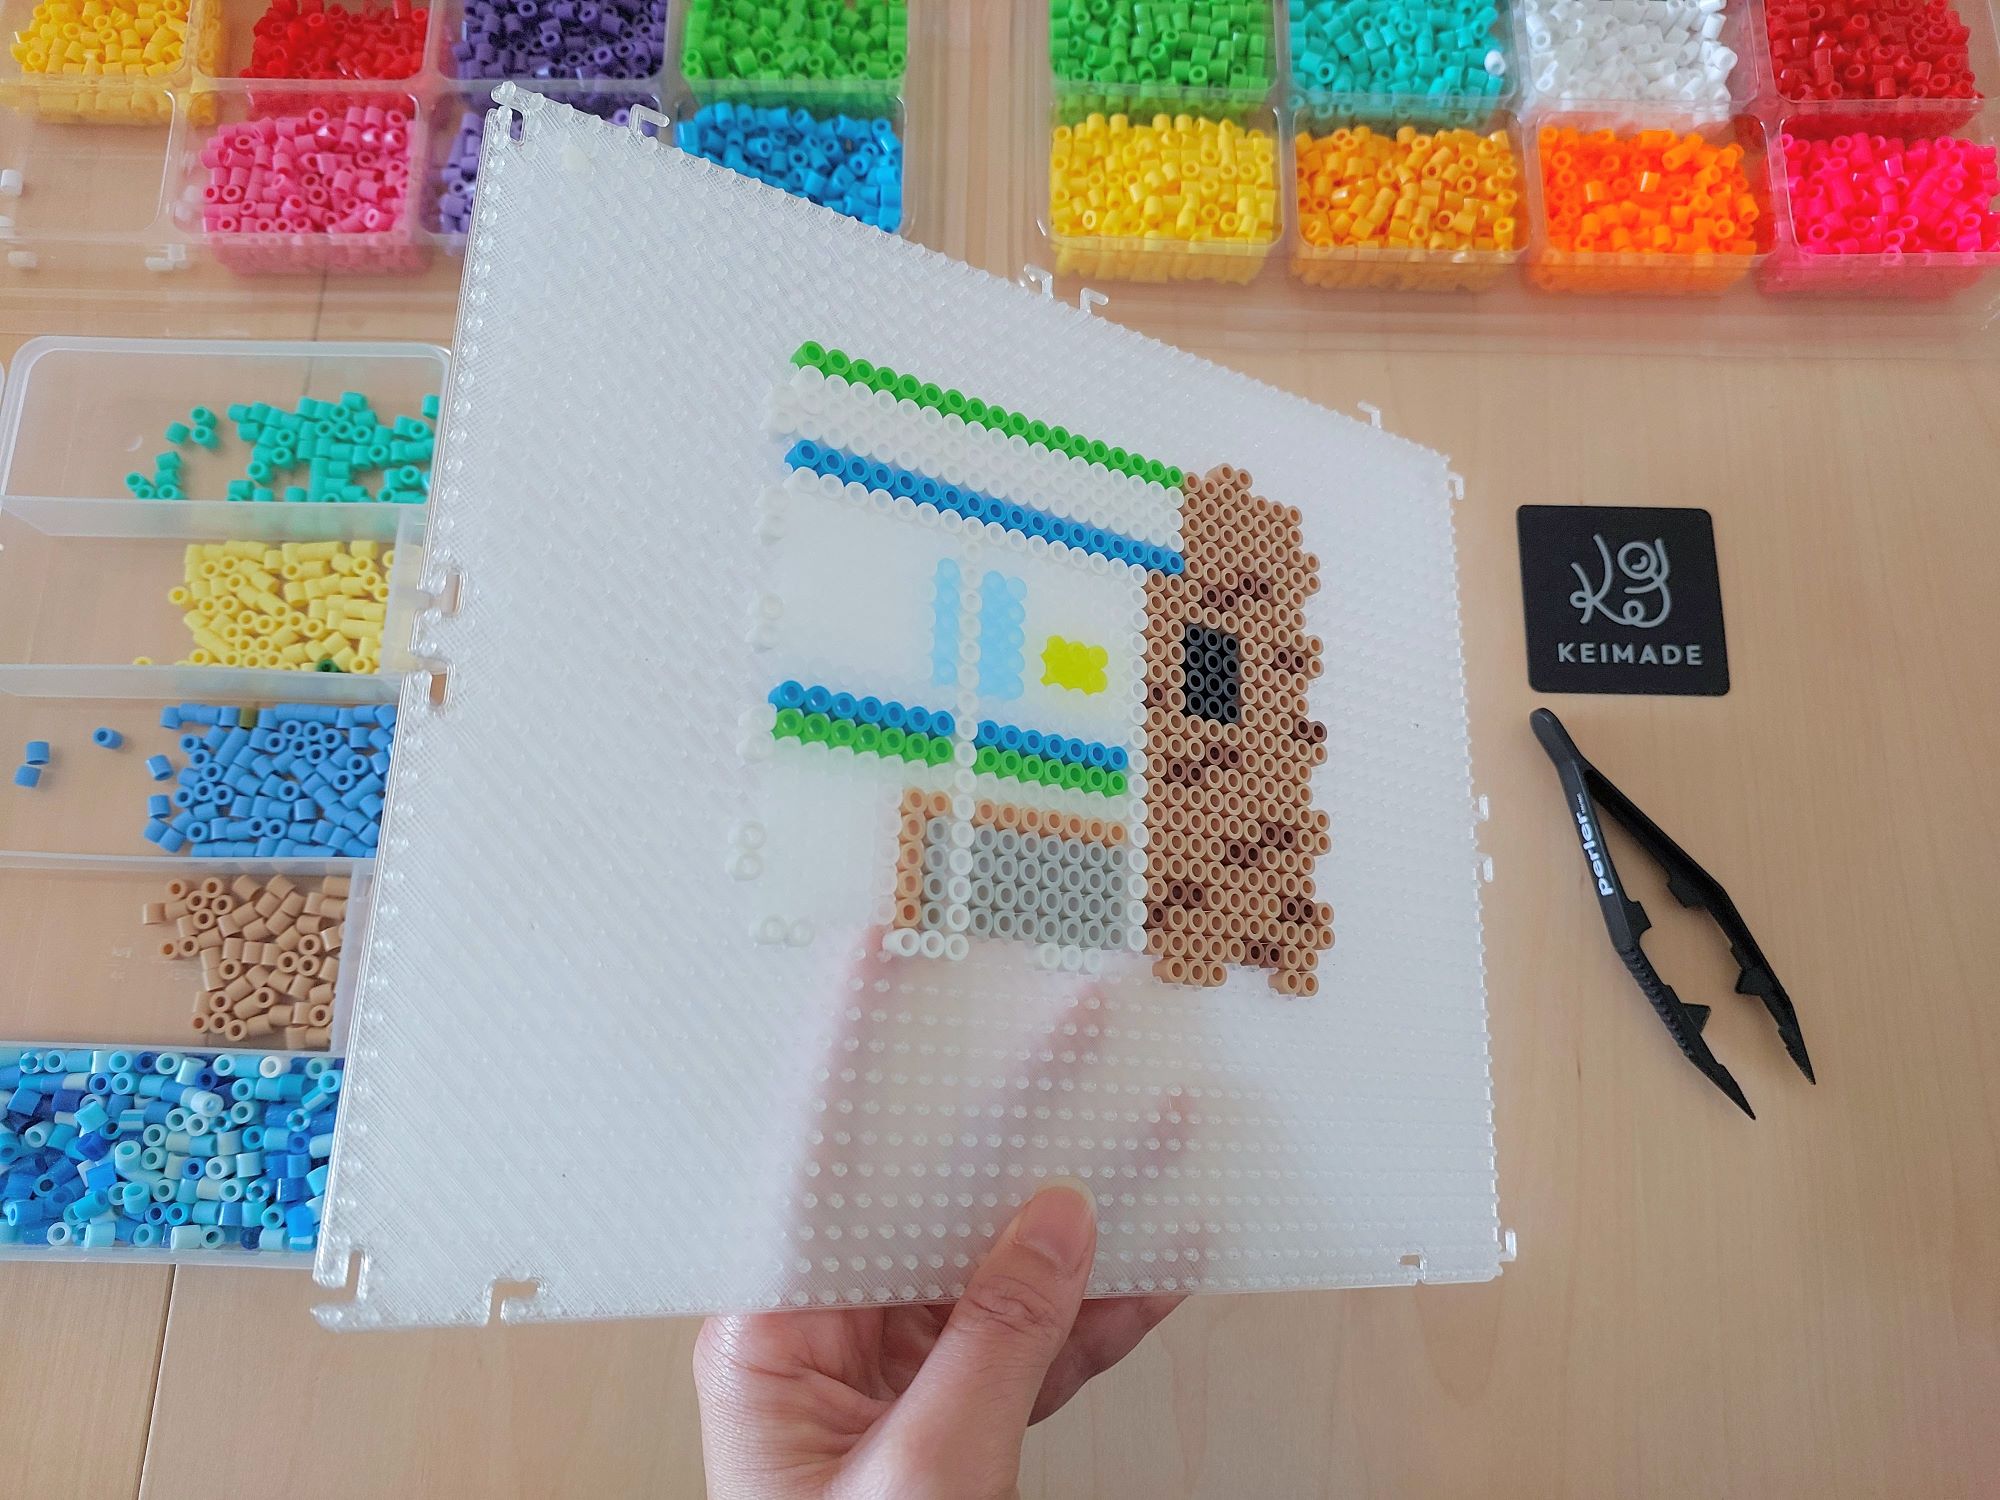
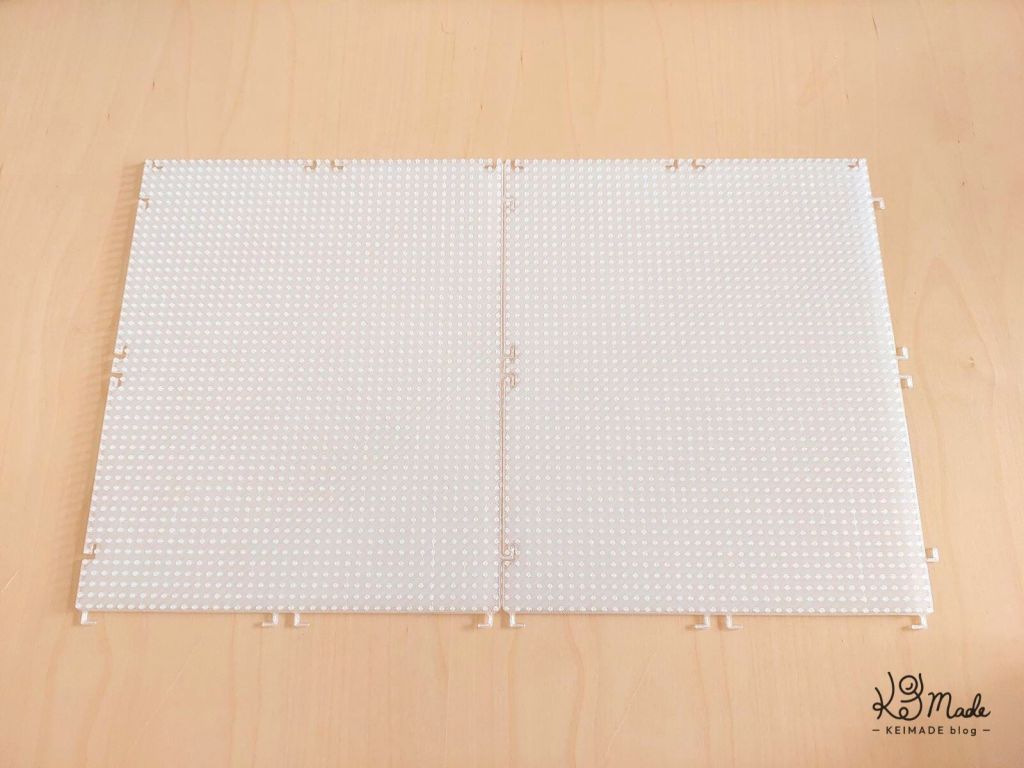
So here’s my new pegboard
Enter my new flat pegboard. It’s 48 pegs wide and 40 pegs tall.
Beads can be placed on the pegs like normal, but if they’re placed in between the pegs they stay in place during fusing due to its lower spacial tolerance.
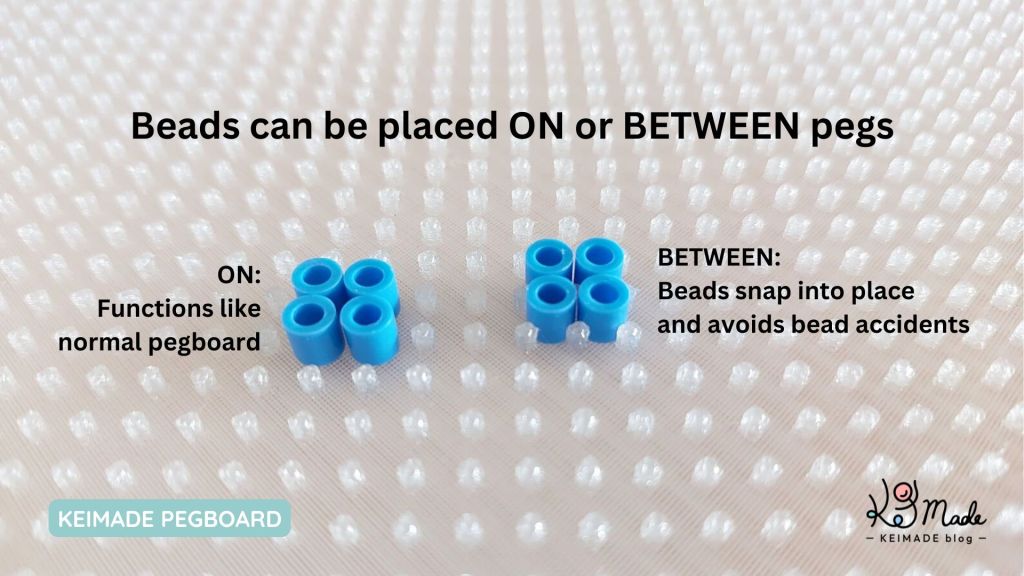
Because beads snap into place between the pegs, they don’t fall off even when the board is tilted. They can still be picked off the board with tweezers – so you can adjust your artwork before you fuse it together.

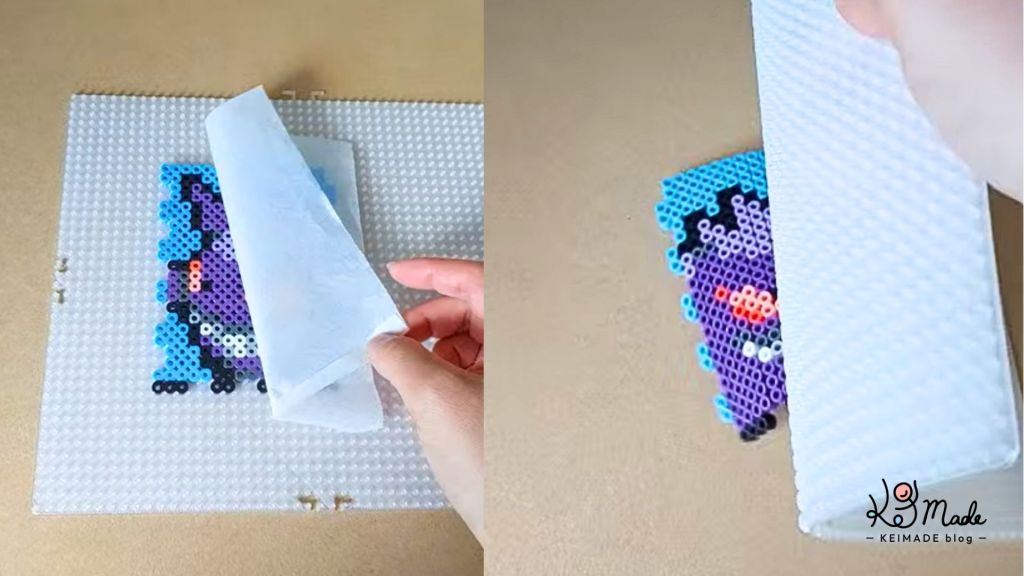
When fused, the beads stay on the board without peeling away with the parchment paper; this helps avoid bead accidents. The pegboard can be peeled backwards to release the fused artwork.
Boards can be connected. (Since the first prototype, the number of connector tabs were increased to 3 spots per side so the corners would connect flat.)
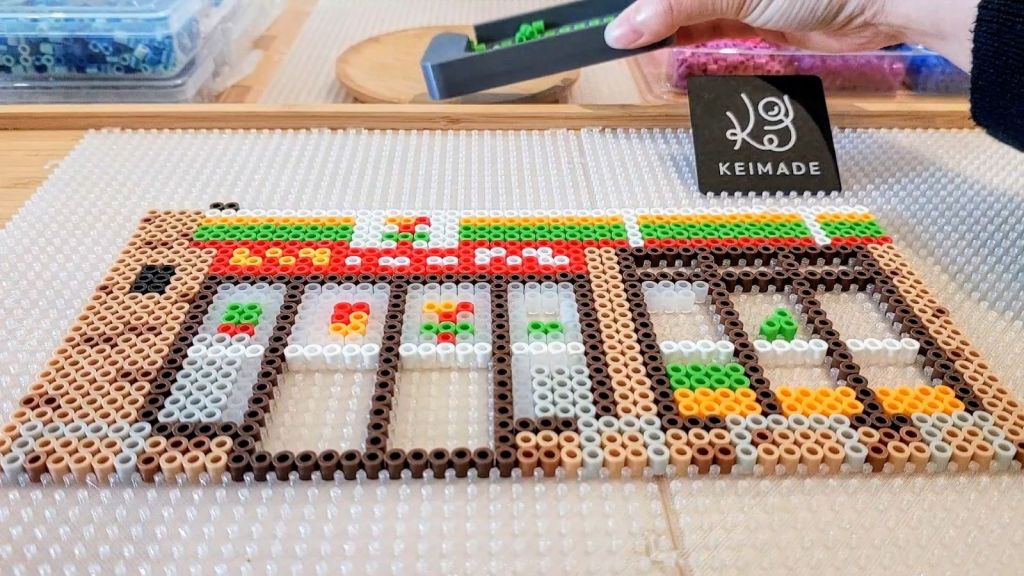
Using multiple boards
Below is a video of me fusing and releasing Perler art from 2 connected pegboards:
I’ve done some testing using multiple boards with my own Perler projects, but I don’t make huge pixel art so I’ve only tested it with 2 connected boards. (That’s still 96×40 or 80×48 pegs worth, and you can always fall back to your usual method by placing beads on the pegs.)
I found that you can also fuse one side and wait for the beads to cool down and curl up off the pegboard, then lift the artwork off the pegboard to place it under some books.
But if you’re making huge perler art, you might decide to fall back to using the pegs and masking tape.
Pros & Cons
Pros:
- The pegboard is flat (as long as it’s placed on a flat surface).
- It’s larger than Perler’s large pegboards, counting 48 pegs wide and 40 pegs tall.
- Beads stay in place, even if you tilt the pegboard.
- When/After fusing, beads don’t peel off the pegboard with the parchment paper.
- The pegboard can be peeled off the fused Perler art.
- While the benefits are gained when you place beads in between the pegs, beads can still be placed on the pegs like normal.
Cons:
- Placing beads in between the pegs can require a little practice as the tolerance is tighter.
- Peeling the pegboard away from fused beads are trickier when using more than 2 connected boards.
- It’s thinner than the Perler pegboards (which is why it can lay flat on a table & be bent backwards to peel), hence more brittle.
I don’t need to be careful with it while using it, but I do want to avoid dropping it on its corner. (When I made one that was thicker, the board ended up slightly curved like the Perler pegboard. It also wasn’t able to flex, making it difficult to get fused Perler art off the pegboard. So this seems to be the optimal thickness.)
Is it for sale?
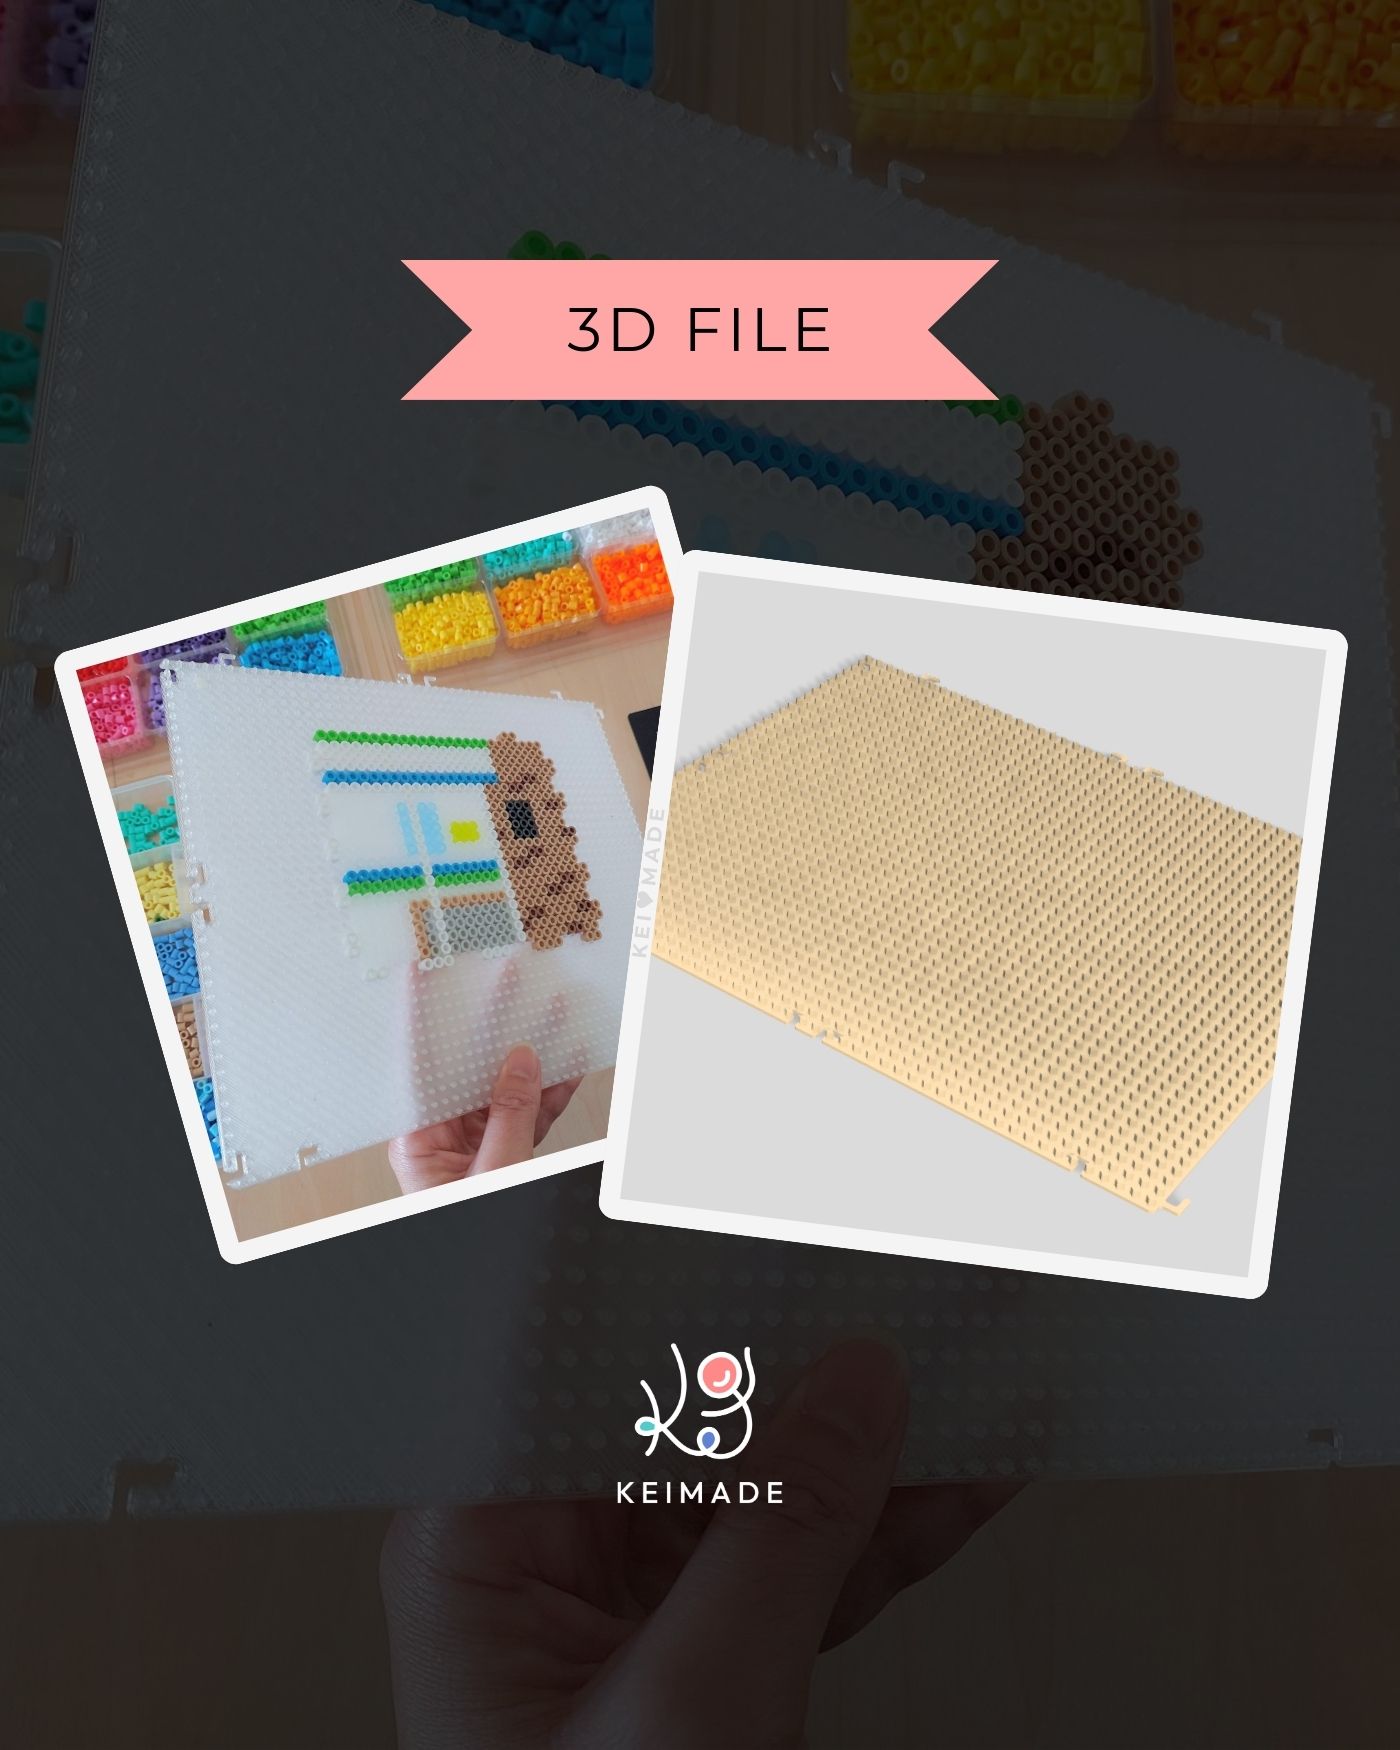
The pegboard is available as a 3D‑printing file. If you or someone you know has a 3D printer, you’re welcome to download it and print as many as you’d like for personal use—whether for yourself, friends, family, or your classroom.
Recommended print settings (for material, perimeters, seam position & infill) are included in the download description, but please be aware that further 3D‑printing support cannot be provided. The price reflects a fraction of the time and care put into prototyping and refinement, along with a small effort to help protect the work from being easily disseminated.

Pegboard 3D File
This pegboard is available to be download as a .step file.
Physical versions aren’t available – sorry! Shipping fees—especially for international orders—ended up being far higher than I wanted to ask anyone to pay, and once shipped, making sure it arrived safely was largely out of my hands.
If you’re like me who:
- Want a bigger, flat pegboard;
- Are sick of beads rolling off before or during fusing;
- Want to avoid using masking tape;
- Don’t mind pressing beads in between the pegs;
- Happy to peel the pegboard away from the fused artwork;
- Generally make pixel art smaller than 80×48 or 96×40 beads;
- Or if making larger artwork, happy to fall back to your usual method;
- Unlikely to whack it on its corner;
… then this pegboard might be for you too 🙂


Leave a Reply