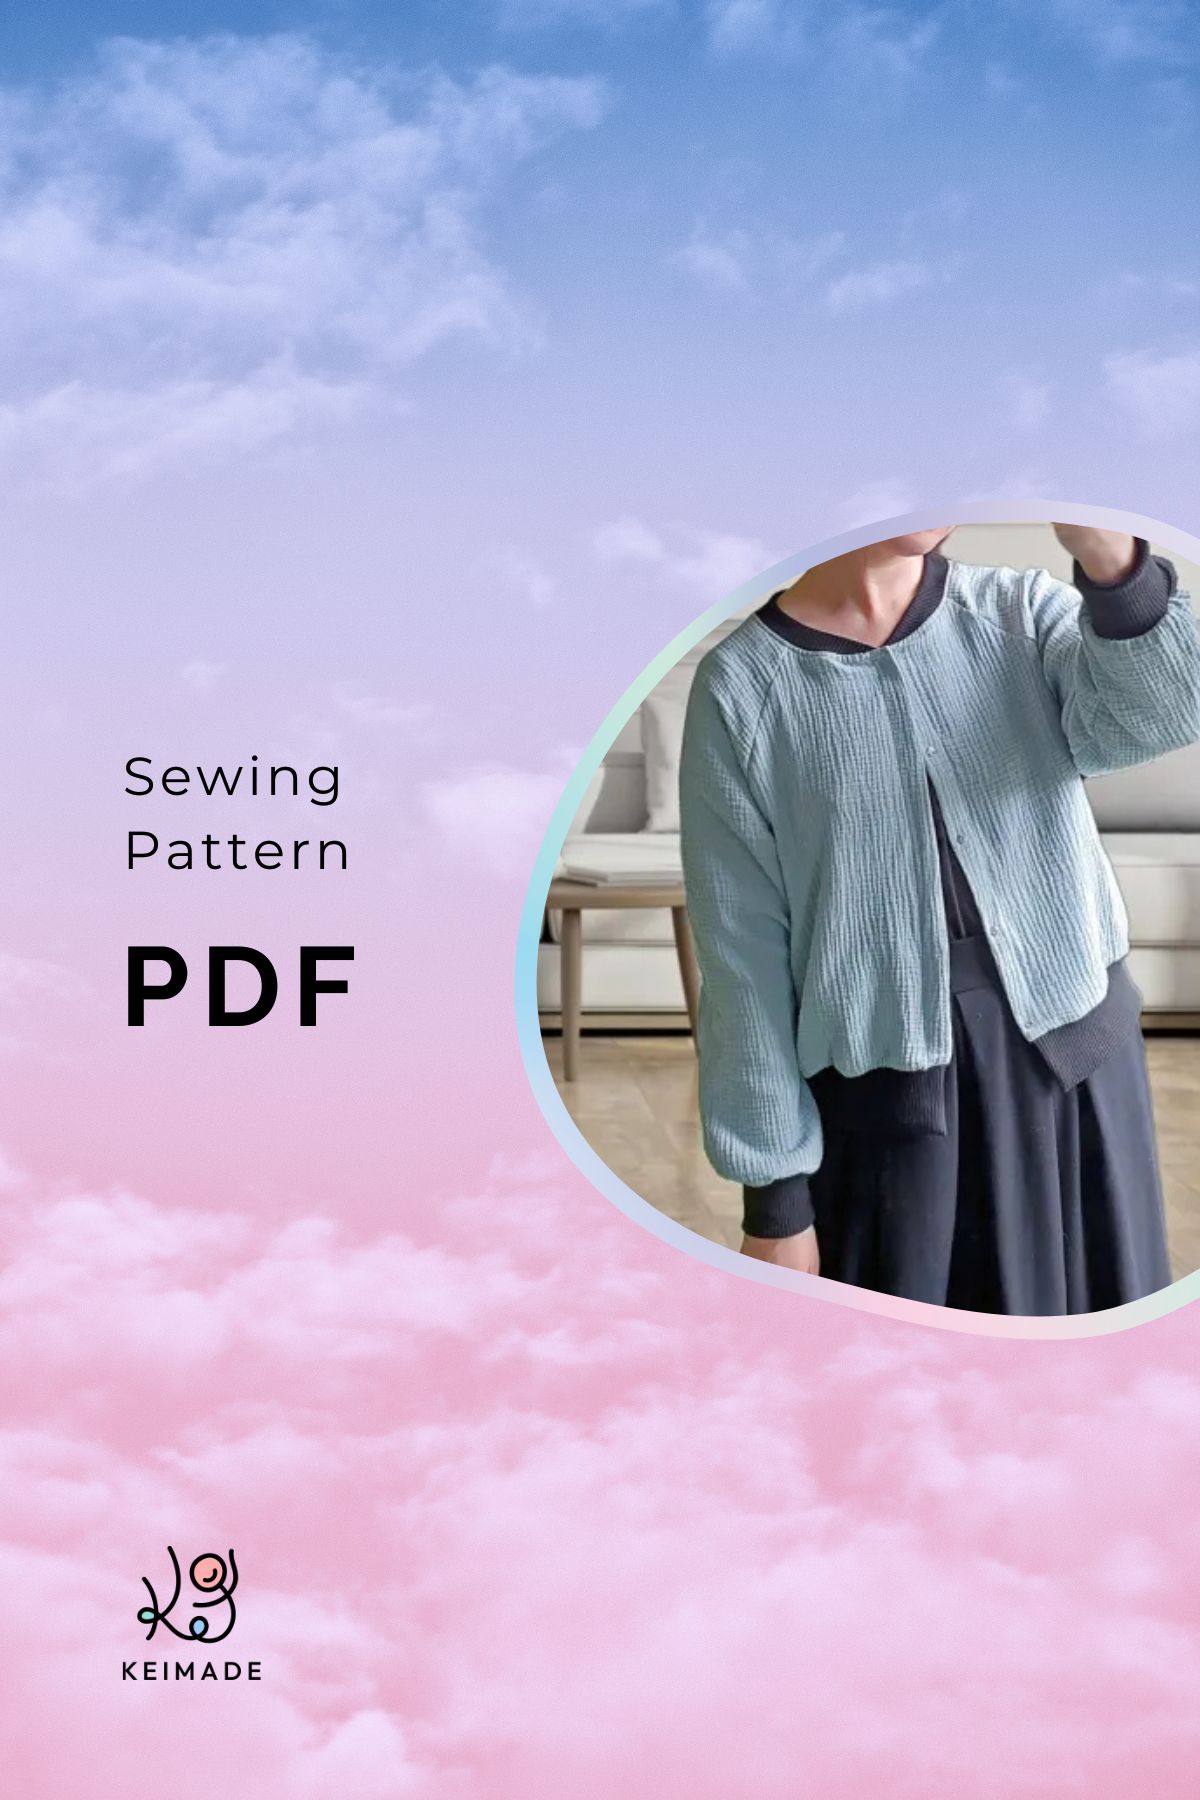
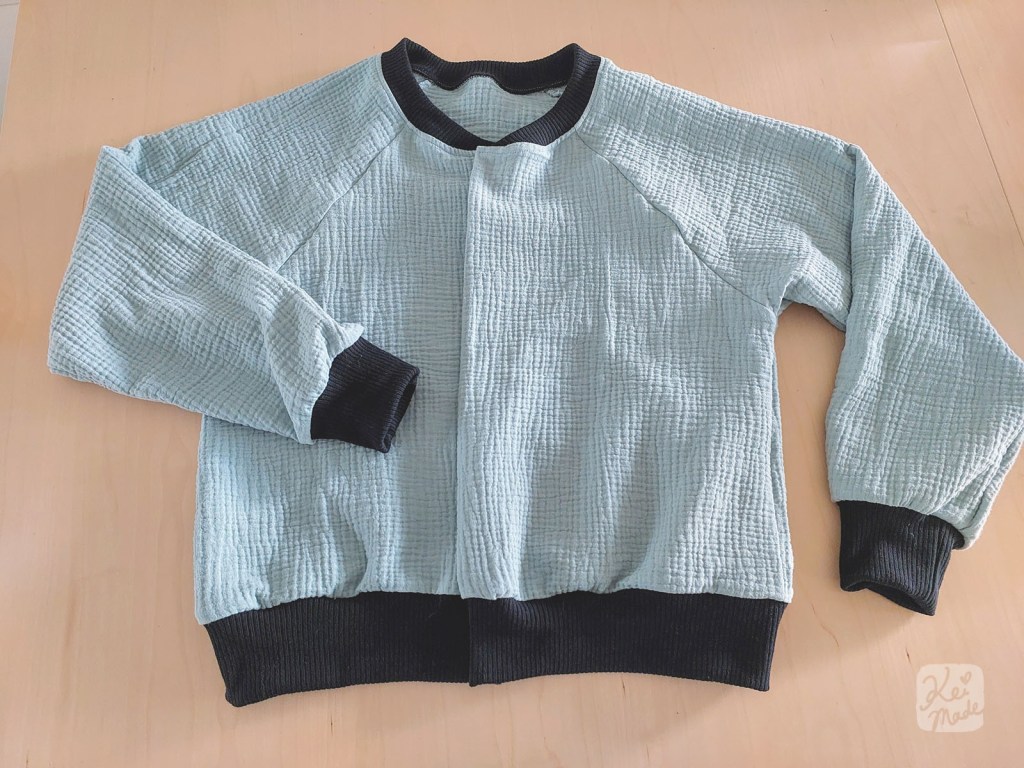
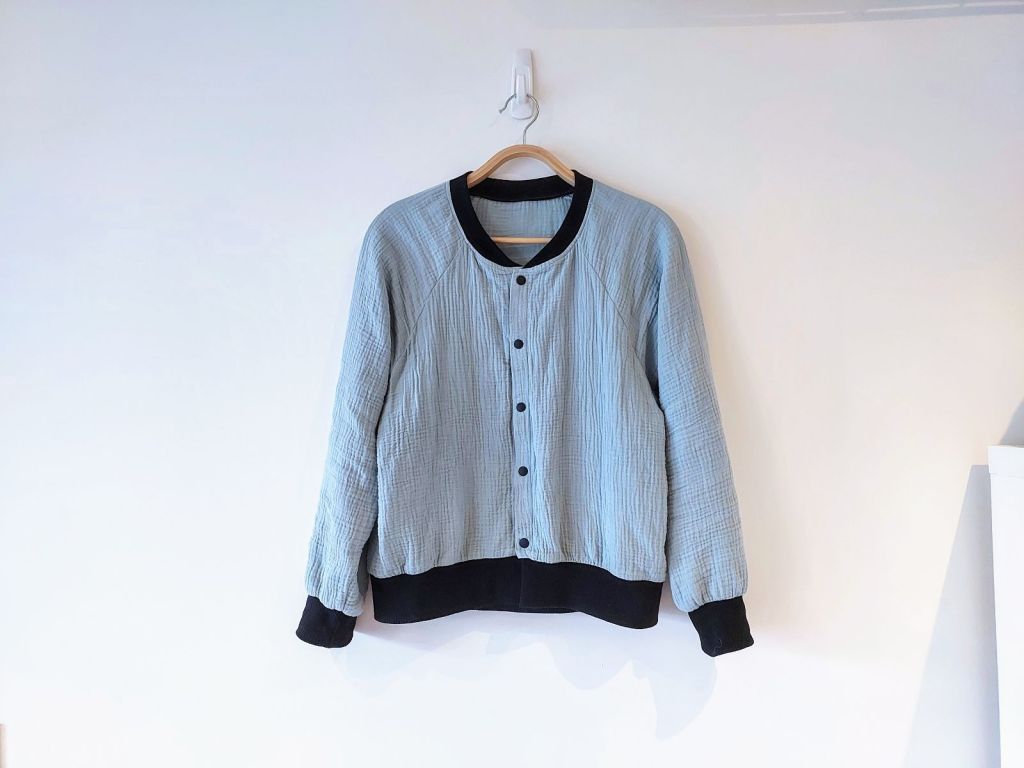
Since I managed to sew a pullover jumper, I figured I could try making a light cardigan / jacket. Let me log my pattern and the making for this bomber jacket style button-down cardigan with raglan sleeves 🙂

Pattern
The base of this pattern was borrowed from BabyLock Japan’s unisex raglan hoodie pattern. The changes I made to the pattern were:
- Hood was swapped out for a ribbed bomber jacket style neckline;
- Front panel was cut in half and extended towards the centre by 5cm for buttons;
- The full length was cut 7cm shorter. (To pair it with a skirt, I’d shorten the length by another 6cm.);
- Cuff panels were reduced to 18cm width;
- Armpit depth was reduced by 2.5cm laying flat (adjusted while sewing and not reflected in image below).

Free printable pattern download:

Please consider a small donation when downloading, or kindly buy me a coffee afterwards to support me.🙏 Thank you!


↑ You can buy Spitz merch to support my blog ↑
Making
Bodice
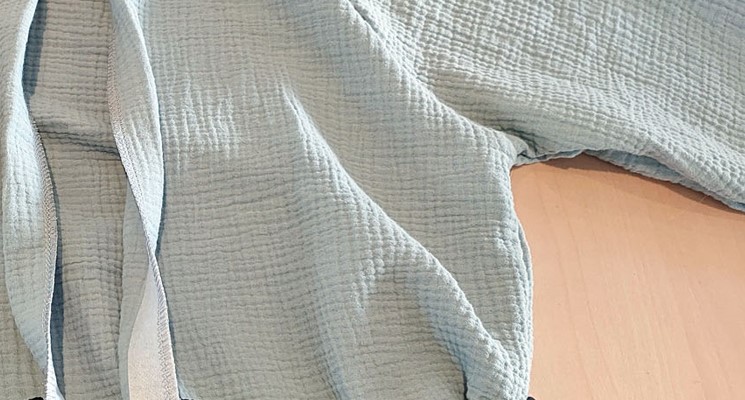
Once the pattern was cut out (and adjusted as above), the diagonal edges were serged together. (Note for next time: increase the differential feed to 1.5 so it’s less wavy.)


Sleeves
Then it was folded in half to resemble a jacket, and the sides were serged together from the wrists to the hem via the armpits (along the red clips).

Interfacing
Interfacing fabric was ironed on along the front opening vertical edges (the seams of where the buttons will go), and the edges were serged.
Collar
To sew on the bomber collar, ribbed fabric was pre-stretched and cut to about 90% of the neckline. (It could have been cut to 100% after pre-stretching, or 80% if no pre-stretching.)
This was clipped along the neckline while stretching, right way facing each other, with the front opening folded inwards and clipped together. (There’s a helpful video down below.)
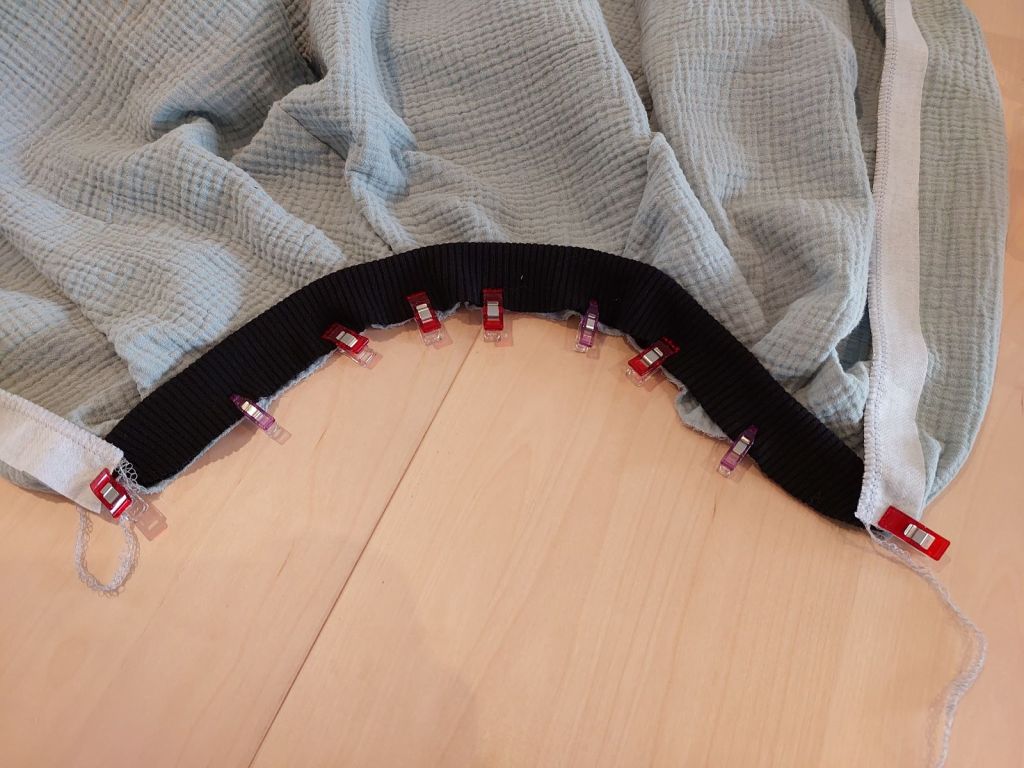
They were serged together, along the red clips.

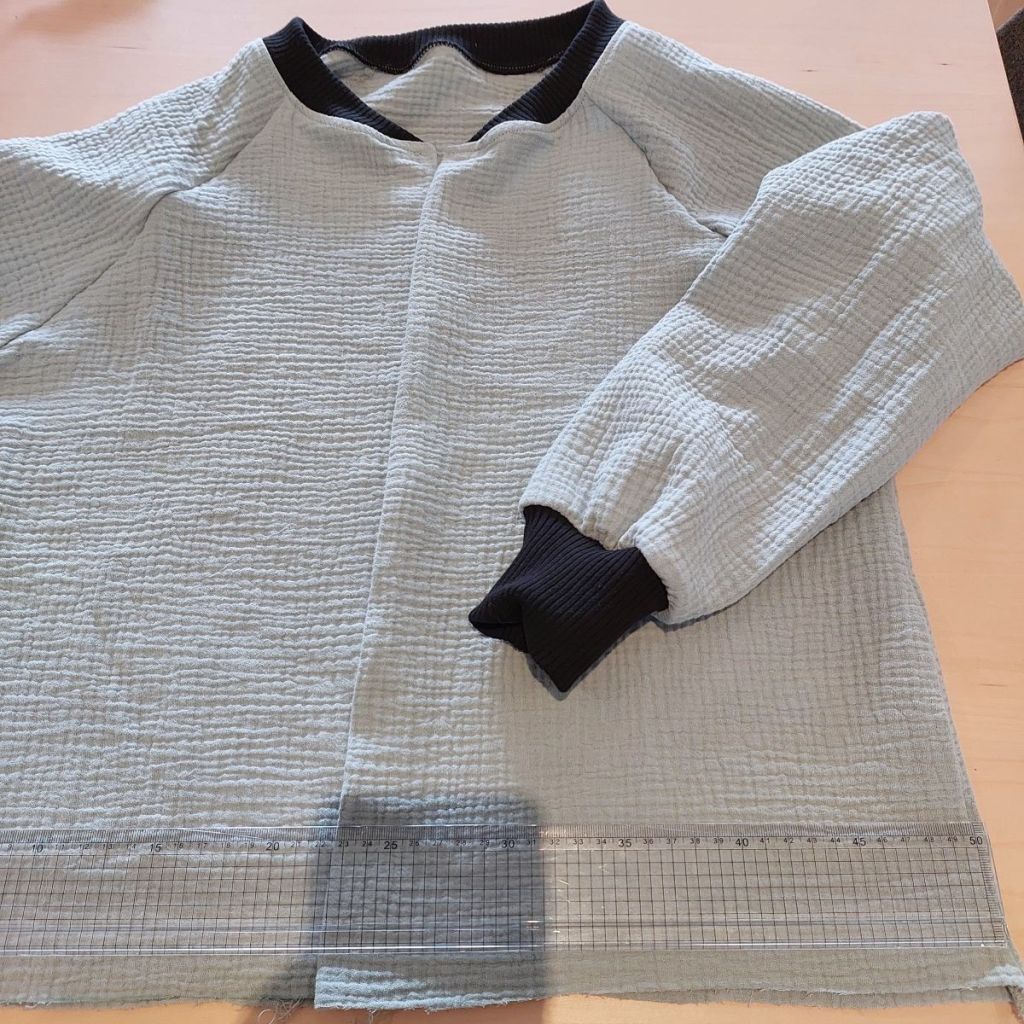
At this point, I tried it on to see if I wanted to adjust the sleeve length or the armpit depth. I ended up reducing the armpit depth by an inch, re-serging diagonally from the sleeves to the hem again. The sleeves were cut to the women’s length mark of Babylock’s hoodie pattern (initially cut at unisex length).
Cuffs
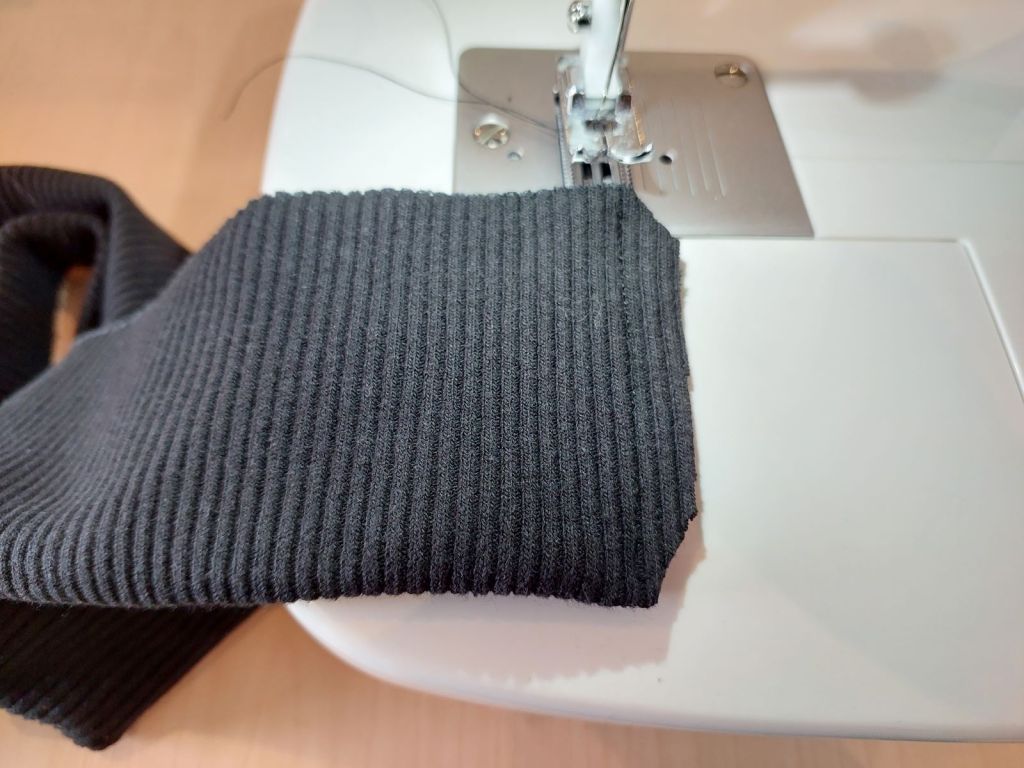
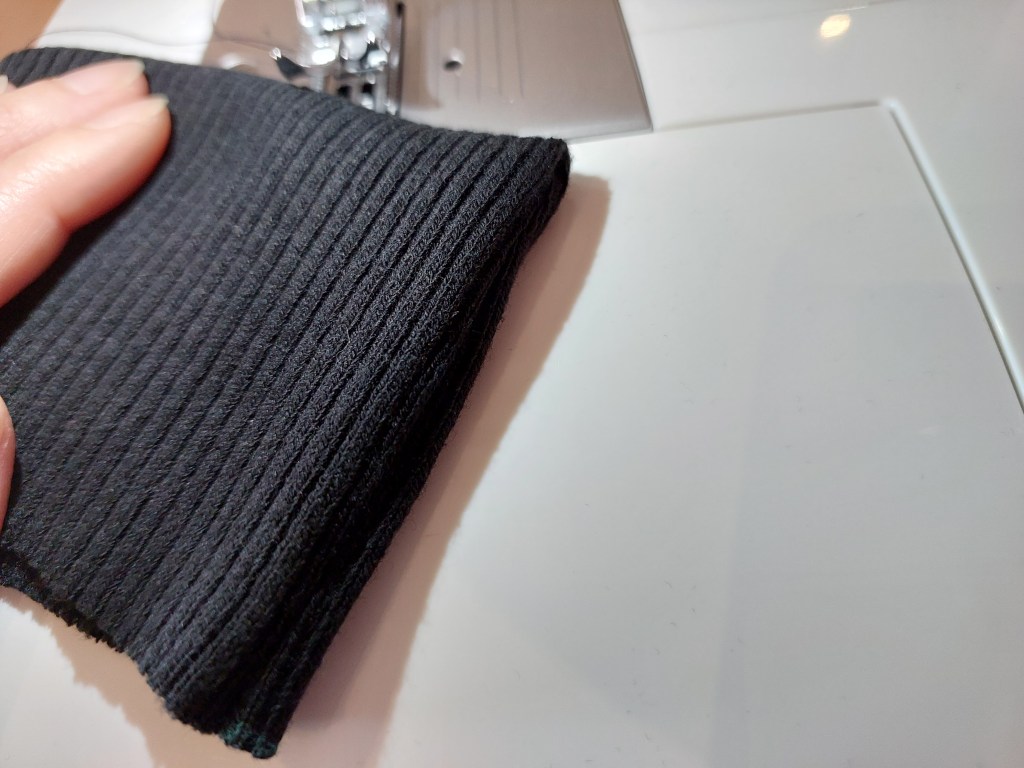
Cuffs were made and serged at the wrists, inside out with the ribbed cuff inside, pulling on the ribbed cuff to match the length while serging.


Hem
Getting close now. I tried it on again to finalise the length of the jacket, and cut off 7cm along the hem.
I also added a lock stitch around the collar to secure it down with the seam towards the body.
To make the hem ribbing, the ribbing was folded in half and sewn along the short edges, about 1cm away from the edge. The corners were cut off on an angle, and flipped right way out.
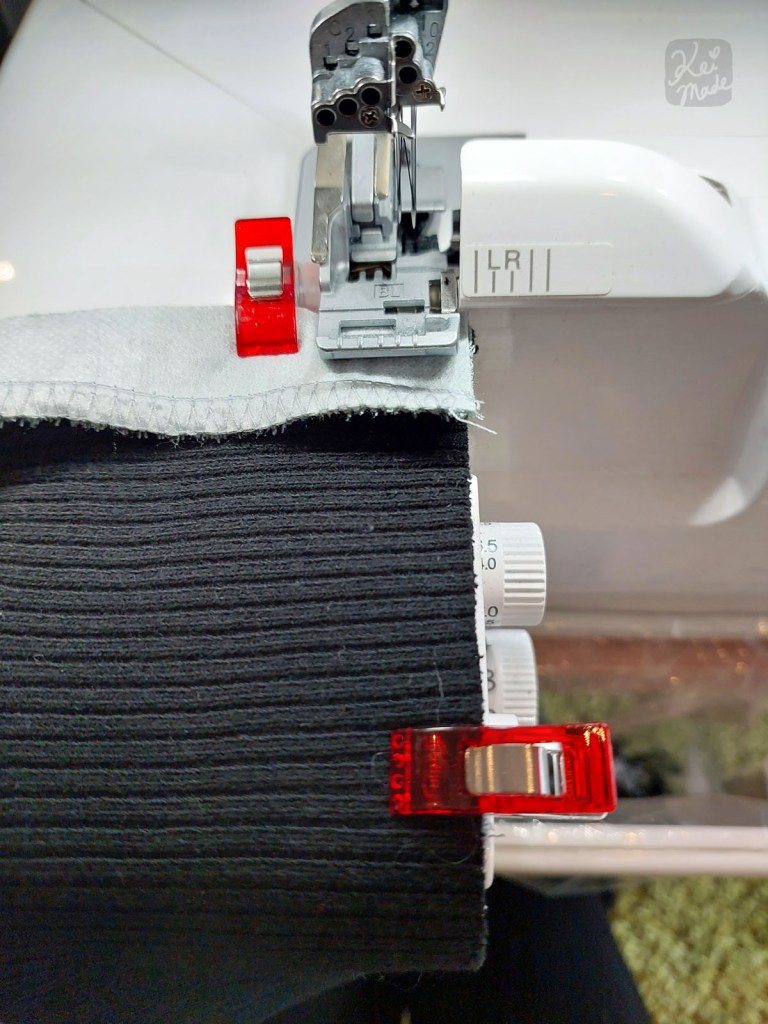
Then, similar to the collar, the hem and the ribbing was aligned and clipped together, right way facing each other. The button seams with interfacing were folded over the top and clipped together.
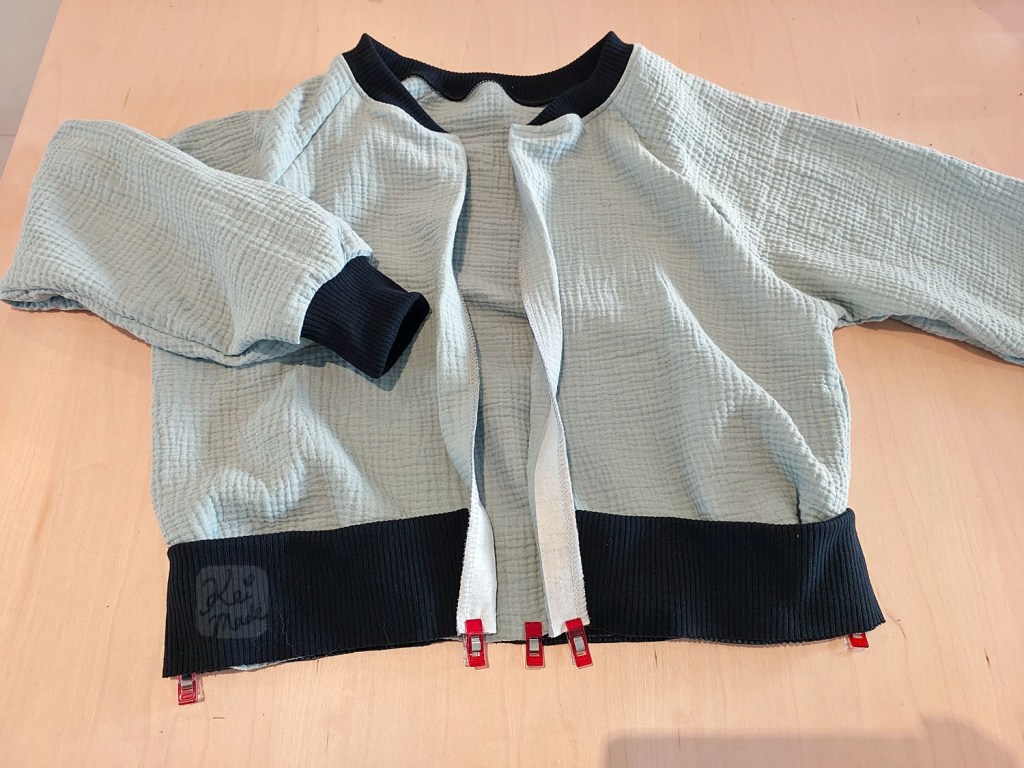
The bottom circumference was serged all the way around, and flipped right way out.


It’s almost done!
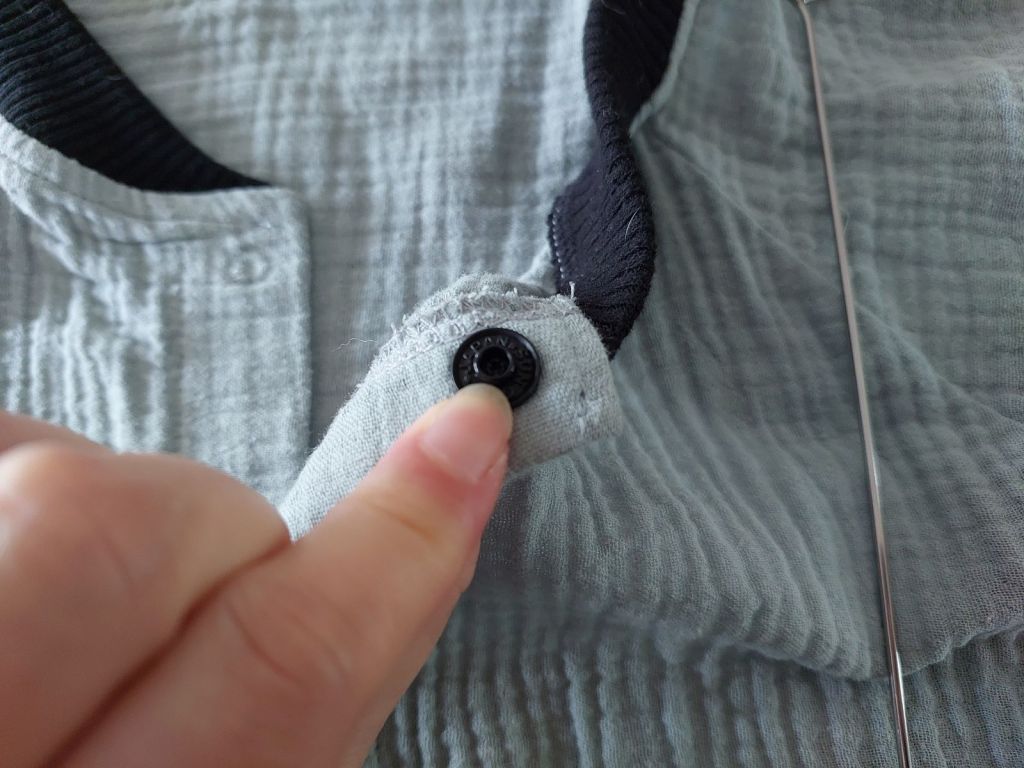
Buttons
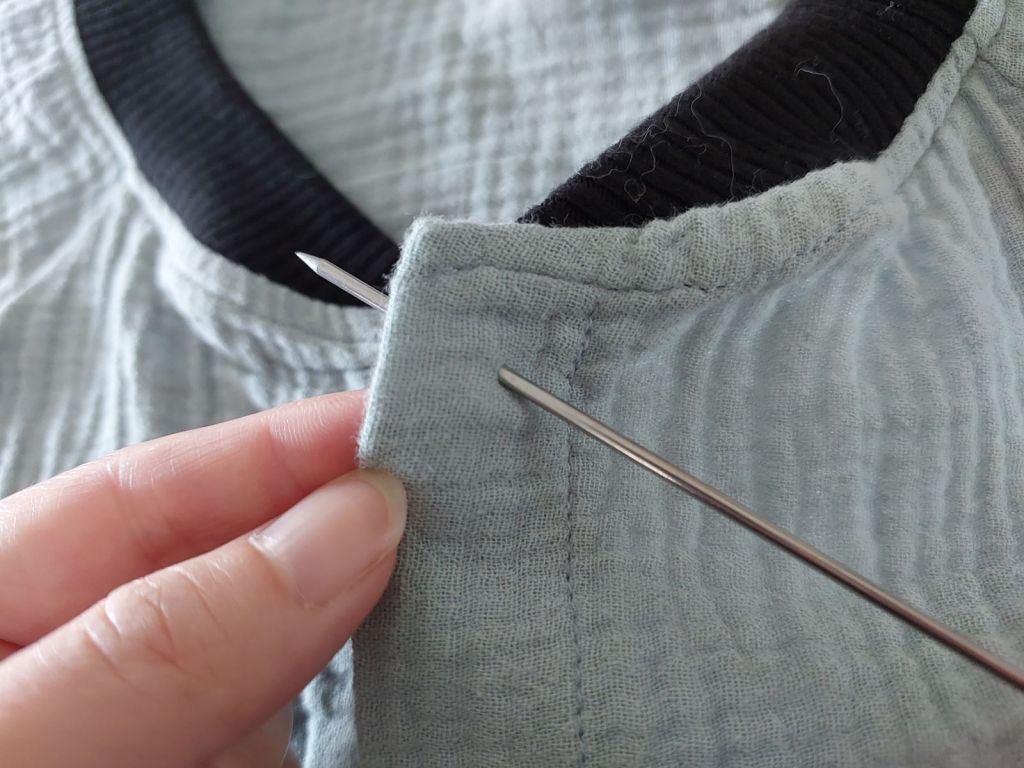
I didn’t have the snap buttons I wanted, so I sewed on some temporary ones.
I sewed on 5 pres studs, starting from the centre and through the interfacing tape. Once the buttons were sewn on, the vertical opening seams from collar to hem were sewn closed.

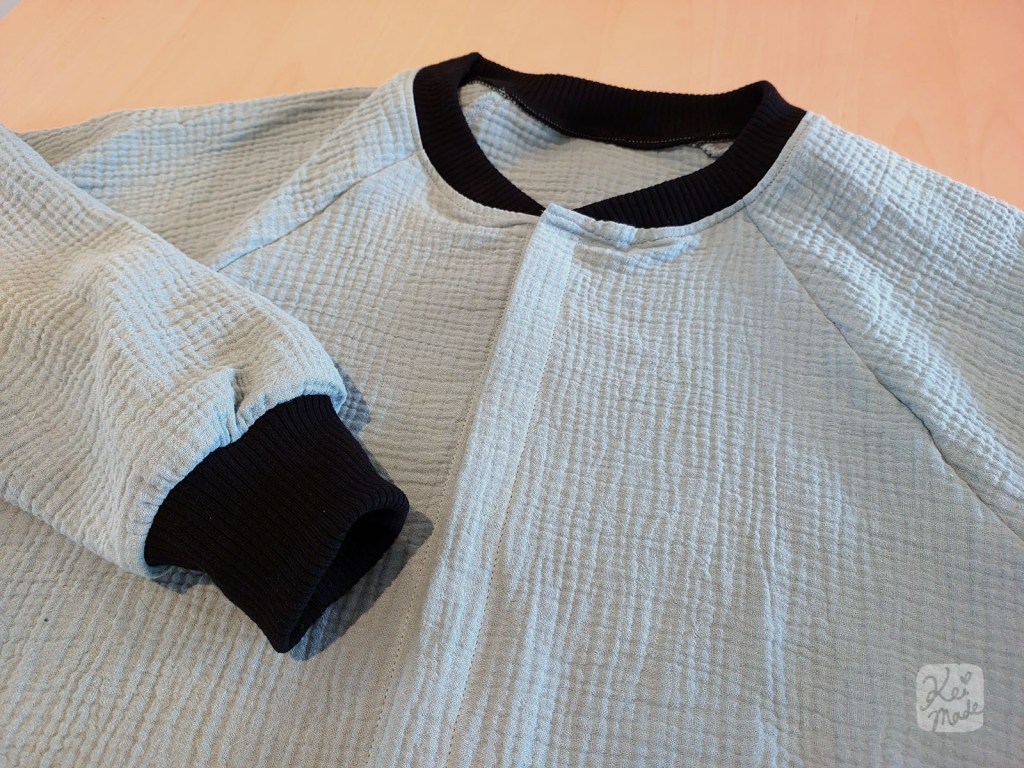
And it is complete!

Here’s a piccie of the cardi opened and closed.


Helpful step-by-step video
This video by Smile Fabric is super helpful to learn how to sew a bomber jacket style cardigan; in particular, how to sew on the ribbed neckline and hem near the front button area. (The sleeves of this video is not raglan but dropped shoulder.)
Fabric
The fabric used to sew this cardi was double cloth cotton in sage and ribbed poly cotton knit, both from Spotlight. I’ve noted down my BabyLock overlocker settings for sewing this fabric:

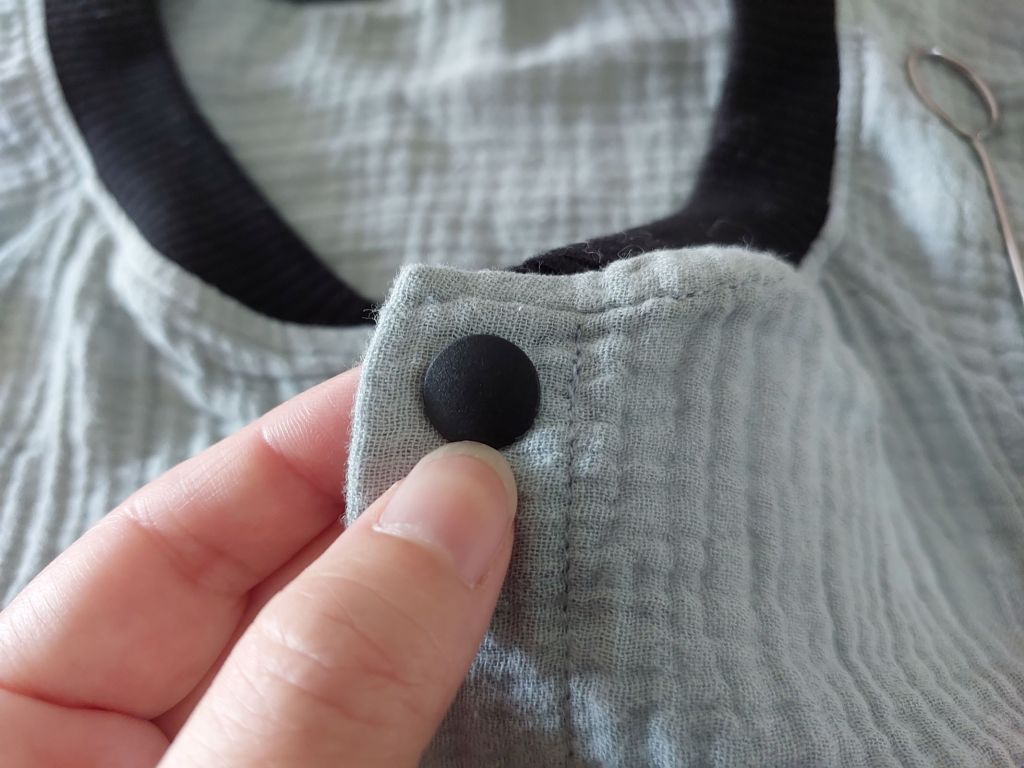
Update: No-tool snap buttons
Time to replace the temporary buttons with my new Tool-less Plastic Snaps!
I discovered these made-in-Japan tool-less plastic snaps by Hemline (made by SunGrip), and bought some from Janome Sewing Centre’s ebay store.
They turned out to be super awesome as expected; to affix them, you poke a hole where it will go (I used a metal cooking skewer), insert the pin of the flat button backing, and press the snapping part onto it from the other side of the fabric.

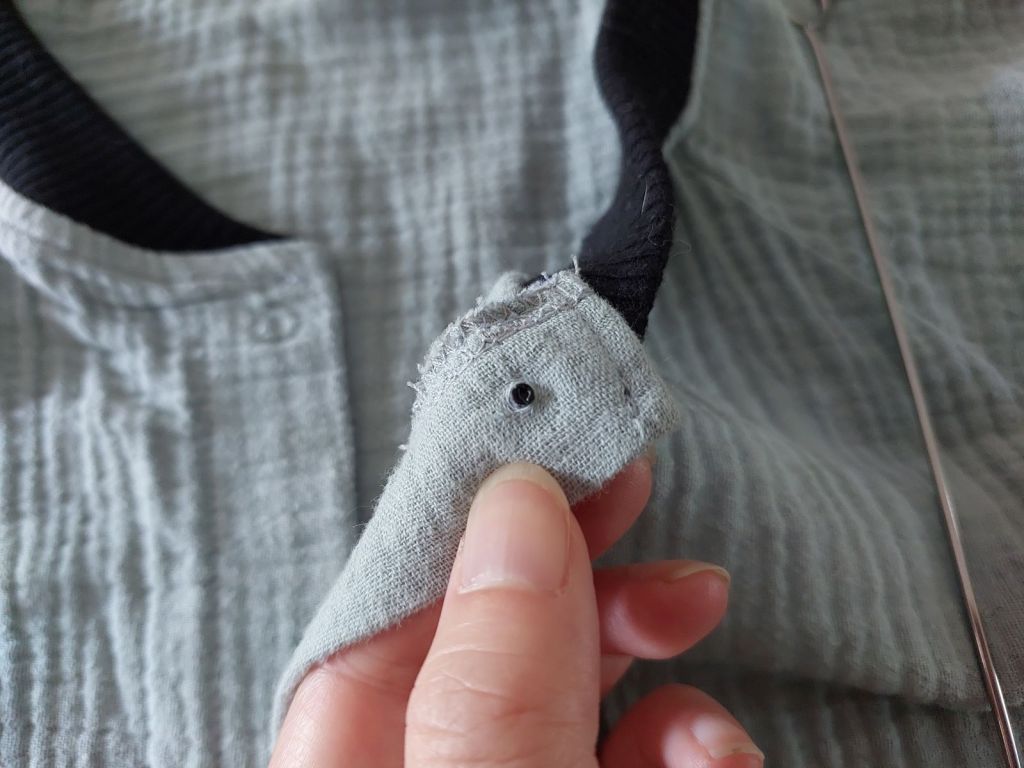


It’s pretty easy to push the wrong part in, and once it’s clicked into place it won’t come out, so be careful! I accidentally pressed the buttons in the unisex direction, but that’s OK!

The buttons feel like they’re gripped well onto the fabric and won’t come out. They also seem to snap in and out without distorting the fabric, so this is great!
If you found my blog helpful, please buy me a coffee or leave a tip to support me 🙏


Leave a Reply