Kimonos are very attractive, but they’re also difficult to put on and keep on; it involves a lot of strings.
So here was my challenge to convert a kimono into a two-piece “nibushiki” kimono that’s quick to put on, comfortable, and looks convincing 👘🙈
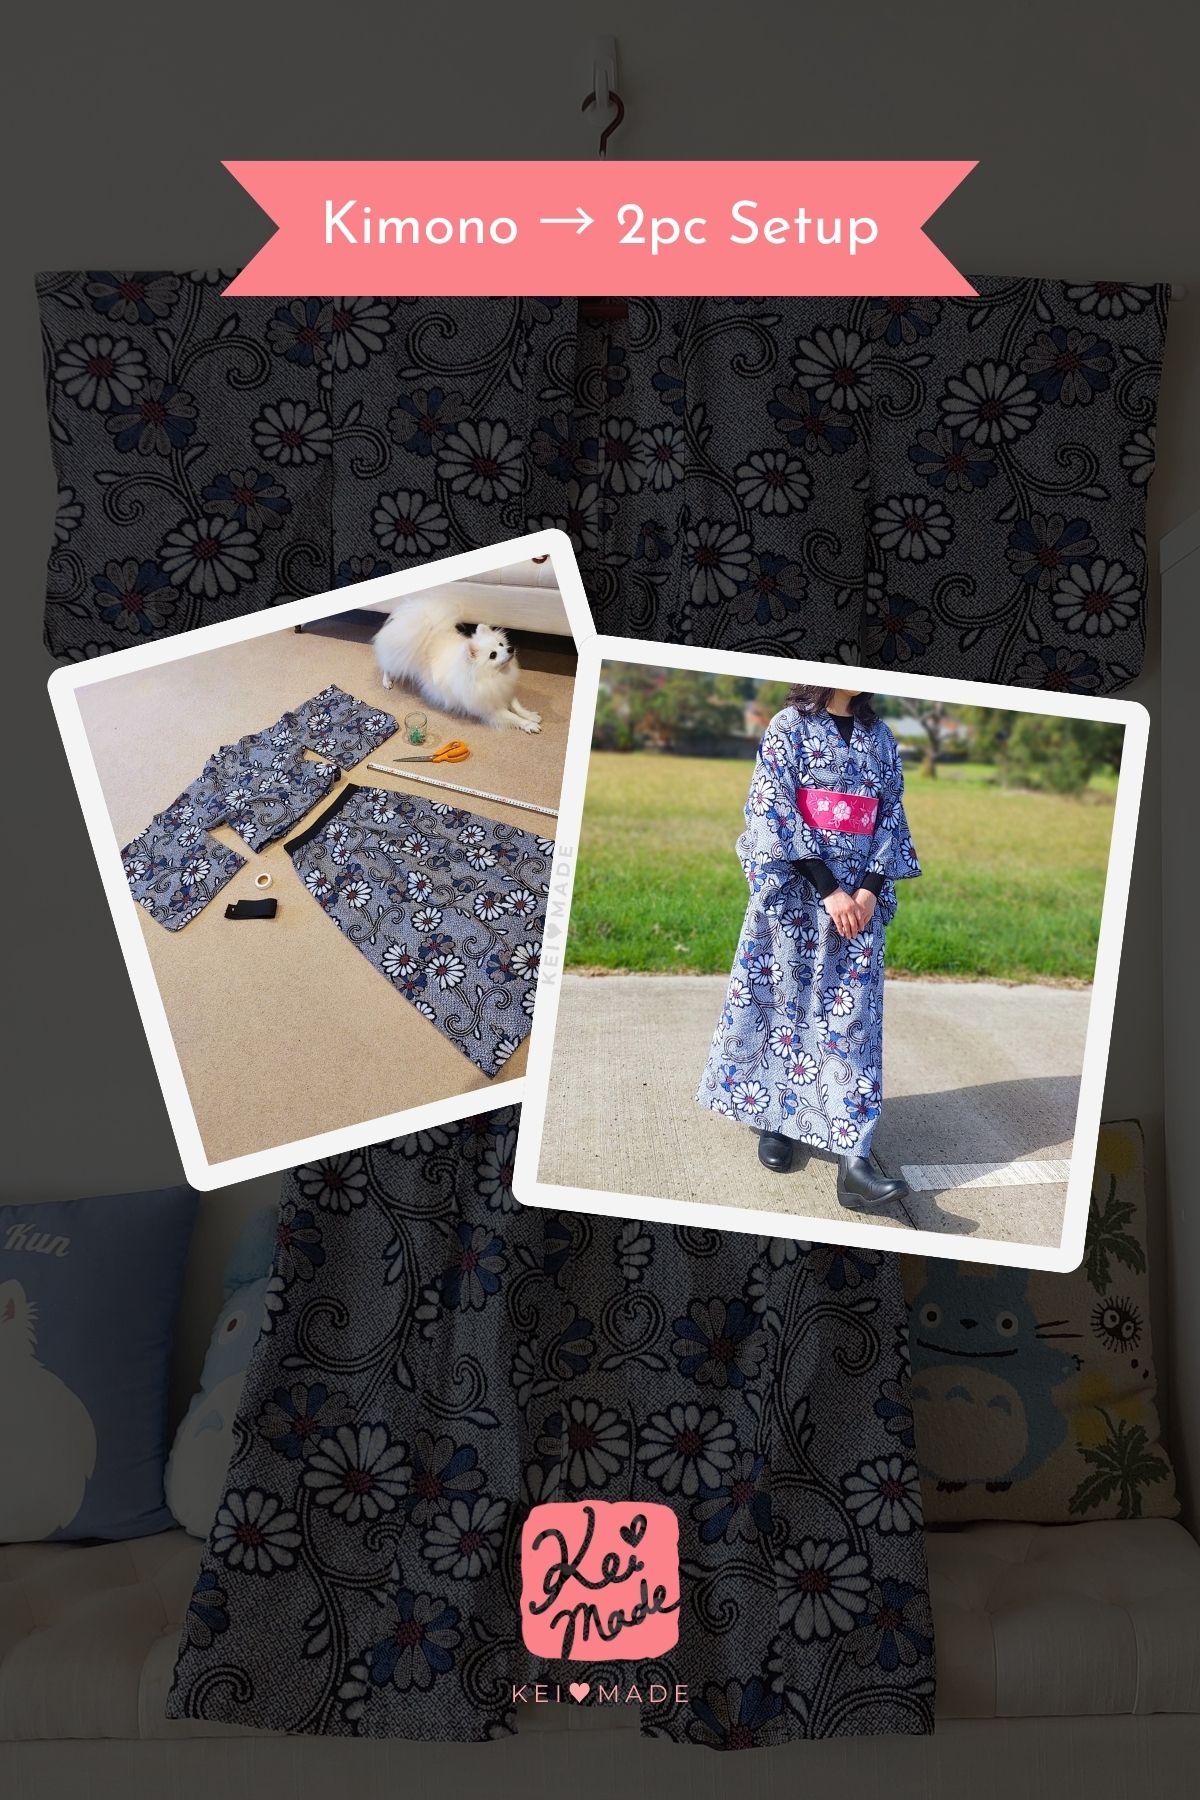
Converting a kimono into a Nibushiki two-piece set
I decided to cut a cotton kimono (yukata) in half to make a top and a skirt that could be worn together with an obi sash.

To be able to walk comfortably, I wanted the skirt to be about 83-85cm long when finished. I also didn’t want to worry about the wind lifting it open, so I decided to make it a closed skirt instead of a wrap skirt.

To make the skirt I…
- cut 85cm off the bottom of the kimono;
- sewed the sides together, leaving a 20cm slit;
- gathered the top with a 50mm wide exposed elastic waistband; and
- hemmed the bottom.
Keeping things simple, for the top I…
- serged along the bottom; and
- hemmed it up so it’s about 50cm long.
…And that was it! 🤣


Now I can pull the skirt on, wrap the top, and put on a one touch obi sash in 30 seconds; no more spending an hour putting on a kimono 😁
As a bonus, I can match the skirt with a normal top and enjoy the unique pattern without an occasion 😊
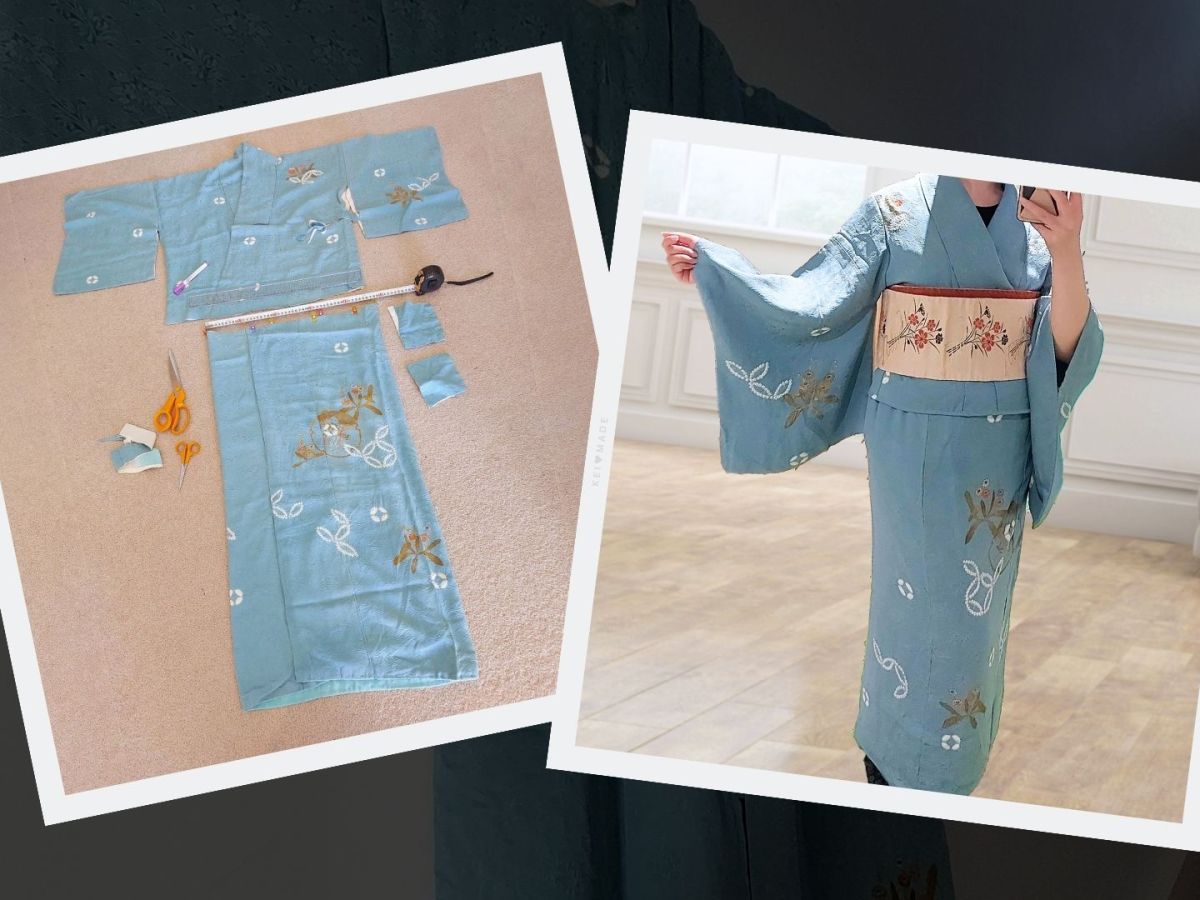
Loving it so much, I converted another yukata into a two piece setup:

My doggie was very impressed:

The inspiration for this very simple transformation came from Hanaomusubi, with tips for exposed waistbands by Sewing Like Mad and Oharico.
There is, however, a great step-by-step 1-hour video on how to put on an authentic kimono by Sunao, which’ll be great for my non-transformed kimonos. 🙂
More kimono transformation projects


Something went wrong. Please refresh the page and/or try again.


Leave a Reply